
Best PHP File Upload Tools to Buy in July 2026
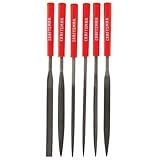
5 pcs Metal Needle File Set,Premium Small File Set, Hardened Alloy Strength Steel File Tools Includes Round, Half-Round, Flat, Square, Triangular File for Detail and Precise Work,by XEKIGU
- HIGH-STRENGTH ALLOY STEEL ENSURES DURABILITY AND LONG-LASTING PERFORMANCE.
- VERSATILE 5-PIECE SET TACKLES A VARIETY OF MATERIALS AND PROJECTS.
- ERGONOMIC, NON-SLIP HANDLES ENHANCE COMFORT AND IMPROVE EFFICIENCY.


REXBETI 25Pcs Metal File Set, Premium Grade T12 Drop Forged Alloy Steel, Flat/Triangle/Half-round/Round Large File and 12pcs Needle Files with Carry Case, 6pcs Sandpaper, Brush, A Pair Working Gloves
- DURABLE T12 DROP FORGED STEEL ENSURES LONG-LASTING CUTTING PERFORMANCE.
- COMPLETE 25-PIECE SET INCLUDING ESSENTIAL FILES AND ACCESSORIES.
- RUGGED CARRY CASE KEEPS TOOLS ORGANIZED AND PORTABLE FOR CONVENIENCE.
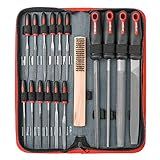
Hi-Spec 17 Piece Metal Hand & Needle File Tool Kit Set. Large & Small Mini T12 Carbon Steel Flat, Half-Round, Round & Triangle Files. Complete in a Zipper Case with a Brush
- PRECISION FILING: IDEAL FOR INTRICATE WORK IN TIGHT SPACES.
- DURABLE T12 CARBON STEEL: ENSURES LONG-LASTING PERFORMANCE AND QUALITY.
- ORGANIZED STORAGE: PORTABLE CASE KEEPS TOOLS SECURE AND ACCESSIBLE.
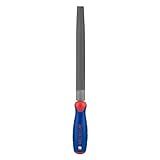
WORKPRO W051002 10 In. Flat File – Durable Steel File to Sharpen Tools and Deburr, Comfortable Anti-Slip Grip, Double Cut – Tool Sharpener for Professionals and DIY (Single Pack)
- ERGONOMIC ANTI-SLIP GRIP FOR COMFORTABLE AND PRECISE TOOL SHARPENING.
- DURABLE 10-INCH FILE WITH DOUBLE-CUT TEETH FOR EFFICIENT FILING.
- VERSATILE MULTIPURPOSE TOOL IDEAL FOR PROFESSIONALS AND DIY ENTHUSIASTS.
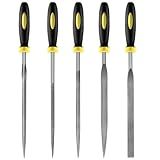
CRAFTSMAN Needle File Set, 6 Piece (CMHT82529)
- PRECISION FILING FOR DETAIL WORK-PERFECT FOR SMALL PROJECTS!
- COMFORTABLE, SURE-GRIP RUBBER HANDLES FOR EASY MANEUVERABILITY.
- SMOOTH PATTERN DESIGN ALLOWS FOR LIGHT, EFFICIENT MATERIAL REMOVAL.
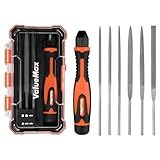
ValueMax 7PCS Interchangeable Needle File Set, Small File Set Includes Flat, Flat Warding, Round, Half-Round, Square, Triangular File and A Handle, Suitable for Shaping Metal, Wood, Jewelry, Plastic
- VERSATILE SET: SIX FILE TYPES FOR ALL YOUR FILING NEEDS AND PROJECTS.
- PORTABLE DESIGN: COMPACT CASE FOR ORGANIZED, ON-THE-GO STORAGE.
- ERGONOMIC GRIP: COMFORTABLE HANDLES FOR EFFICIENT AND PRECISE HANDLING.
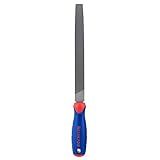
KALIM Flat Medium Cut File, Double Cut Teeth, 6'' Length, Made of High Carbon Steel, Hand File Without Handle Suitable for Wood, Metal, Sharpening, etc.
- OPTIMAL SIZE FOR PRECISION WORK: 7.5'' TOTAL LENGTH FOR EASY HANDLING.
- DURABLE & EFFICIENT MATERIAL: HIGH CARBON CONTENT FOR FAST MATERIAL REMOVAL.
- VERSATILE APPLICATIONS: PERFECT FOR METAL, WOOD, PLASTIC, AND MORE!
WORKPRO W051003 8 In. Half Round File, Durable Steel File for Concave, Convex & Flat Surfaces, Comfortable Anti-Slip Grip, Double Cut & Single Cut, Tool Sharpener for Pro's and DIY (Single Pack)
- EFFORTLESSLY SHAPE CURVES AND EDGES ON WOOD, METAL, AND PLASTIC.
- ERGONOMIC ANTI-SLIP GRIP ENSURES COMFORTABLE, PRECISE HANDLING.
- DURABLE, RUST-RESISTANT TEETH FOR VERSATILE CUTTING IN ANY SITUATION.
To upload files using PHP, follow these steps:
- Create an HTML form with the file input field:
- Create a PHP script (e.g., upload.php) to handle the file upload:
- In the PHP script, the $_FILES["file"] represents the uploaded file. It contains properties like name, tmp_name (temporary file name on the server), error (error code if any), type (MIME type), and size (file size in bytes).
- Check if the file was uploaded successfully by checking the error property against the constant UPLOAD_ERR_OK (value 0).
- Use the move_uploaded_file() function to move the uploaded file from its temporary location to the desired directory (uploads/ in the example above).
- Display a success message if the file was uploaded successfully. Otherwise, display an error message.
Remember to ensure that the destination directory has proper write permissions for the web server.
How to create a whitelist of allowed file extensions for uploads in PHP?
To create a whitelist of allowed file extensions for uploads in PHP, you can follow these steps:
- Define an array of allowed file extensions that you want to allow for uploads. For example, if you want to allow only images with the extensions .jpg, .png, and .gif, you can define the following array:
$allowedExtensions = array('jpg', 'png', 'gif');
- After a user uploads a file, you can access its extension using the pathinfo() function in PHP. This function returns an associative array containing information about the path, including the extension.
$uploadedFile = $_FILES['file']['name']; $extension = pathinfo($uploadedFile, PATHINFO_EXTENSION);
- Check if the file extension is present in the list of allowed extensions. You can use the in_array() function to perform this check.
if (!in_array($extension, $allowedExtensions)) { // File extension is not allowed }
- Handle the case where the file extension is not allowed. For example, you can display an error message to the user or reject the upload.
if (!in_array($extension, $allowedExtensions)) { echo "Error: Not an allowed file extension."; // Handle the error, e.g., redirect or exit the script exit; }
Note: It's important to note that checking only the file extension is not foolproof and can be bypassed by renaming files. Additionally, it's recommended to perform further security checks on uploaded files such as validating the file type using file signatures or MIME types, restricting file sizes, and storing uploaded files outside the web root directory.
How to display a success message after file upload in PHP?
To display a success message after a file upload in PHP, you can follow these steps:
- Create an HTML form with an input field of type "file" and a submit button:
- In the "upload.php" file, handle the file upload process. You can use the $_FILES superglobal to access the uploaded file information:
- After the file is uploaded successfully, the success message "File uploaded successfully!" will be displayed.
Note: Make sure the folder where the uploaded files are saved (in this case, the 'uploads/' folder) has the proper write permissions for the PHP process in order to move the uploaded file.
What is the maximum number of files that can be uploaded at once using PHP?
The maximum number of files that can be uploaded at once using PHP depends on the server's configuration. By default, the maximum number of files that can be uploaded at once is determined by the max_file_uploads directive in the php.ini file. The default value is usually set to 20.
However, this limit can be modified by editing the php.ini file or using .htaccess file. The max_file_uploads directive can be increased to allow more files to be uploaded simultaneously.
How to check if a file upload is empty using PHP?
To check if a file upload is empty using PHP, you can use the $_FILES superglobal variable. It contains information about uploaded files.
Here is an example code snippet to check if a file upload is empty:
if($_FILES['file']['size'] == 0){ echo "No file uploaded"; } else { echo "File uploaded"; }
In the above example, $_FILES['file']['size'] is used to check the size of the uploaded file. If the size is 0, it means that the file upload is empty or no file was selected.