
Best Bootstrap Tools to Use with Next.js to Buy in July 2026
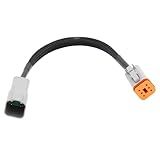
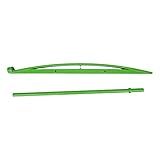
Evinrude Bootstrap Tool – EMM Update & Restore Tool for Evinrude Outboards – Compatible with EvDiag Diagnostic Software – BRP P/N 586551
-
ESSENTIAL FOR ENGINE RECOVERY: RESTORES AND UPDATES EMMS EFFORTLESSLY.
-
COMPATIBLE WITH BRP DIAGNOSTICS: UNLOCKS ADVANCED BOOTLOADER FEATURES.
-
TRUSTED BY PROS: PERFECT FOR TECHNICIANS AND EVINRUDE SERVICE CENTERS.


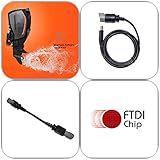
USB Diagnostic Tool Scanner KIT with Bootstrap for EVINRUDE Outboard Engine E-TEC/Fitch
- DIAGNOSE EVINRUDE E-TEC/FITCH ENGINES EASILY WITH USB SCANNER.
- COLLECT DATA AND RUN TESTS TO TROUBLESHOOT OUTBOARD ENGINES EFFECTIVELY.
- COMPATIBLE WITH ALL WINDOWS PCS, LAPTOPS, AND TABLETS (XP TO 10).
Bootstrap Farmer Ground Post Driver - Greenhouse Post Driver
- SECURELY ANCHORS GROUND POSTS, PREVENTING DEFORMATION.
- COMPATIBLE WITH STANDARD 1 5/8 GROUND POSTS FOR VERSATILITY.
- DURABLE DESIGN WITHSTANDS HEAVY SLEDGEHAMMER STRIKES.
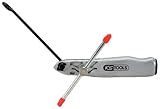
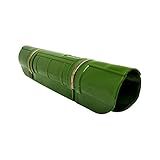
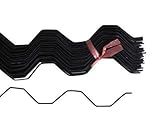
Clamp+cutting tool (CV boot straps)
- TRUSTED GLOBALLY BY CUSTOMERS IN 135+ COUNTRIES FOR RELIABILITY.
- SUPERIOR STRENGTH-ADVANCED DESIGN MAINTAINS EXACT TORQUE LENGTH.
- INTERCHANGEABLE HEADS MADE FROM DURABLE ALLOY STEEL FOR VERSATILITY.
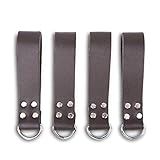
LAUTUS Heavy Duty Leather Tool Belt Strap Connectors Accessories (Suspender Loop Hook Attachment 4-Pack)
- 100% GENUINE LEATHER: DURABLE, STYLISH, AND BUILT TO LAST!
- FITS ANY 3 TOOL BELT: PERFECT COMPATIBILITY FOR ALL YOUR NEEDS.
- LIFETIME WARRANTY: QUALITY ASSURANCE FOR YOUR PEACE OF MIND!
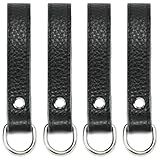
Leather Tool Belt Suspender Loops,Tool Belt Strap Connectors Accessories fits 3 inch Belt Connectors, (Suspender Loop Attachment 4-Pack) (3in Pebbled leather)
- DURABLE GENUINE LEATHER FOR LONG-LASTING, HEAVY-DUTY USE.
- EASY ATTACHMENT FOR SUSPENDERS TO BELTS UP TO 3 INCHES WIDE.
- IDEAL FOR TRADESPEOPLE: CARPENTERS, ELECTRICIANS, AND LABORERS.
Bootstrap Farmer Snap On Clamps 1/2 inch 50 pack Row Cover Clips for Greenhouse Plastic Shade Cloth
- SECURELY ATTACH MATERIALS TO CONDUIT FOR VERSATILE USE OUTDOORS.
- DURABLE ABS AND METAL CLIPS ENSURE LONG-LASTING PERFORMANCE.
- UV-RESISTANT DESIGN WITHSTANDS HARSH WEATHER CONDITIONS EFFORTLESSLY.
Bootstrap Farmer Hoop Bender 20ft Wide Greenhouse - Pole Bender
- EFFORTLESSLY BEND 1 3/8 POSTS FOR QUICK HOOP CONSTRUCTION!
- DURABLE GALVANIZED STEEL ENSURES LONG-LASTING PERFORMANCE!
- ESSENTIAL FOR BUILDING EFFICIENT CATERPILLAR GREENHOUSES!
Bootstrap Farmer Hoop Bender 10ft Wide Greenhouse - HD Pole Bender
- EFFORTLESSLY BENDS 1 3/8 POSTS FOR QUICK HOOP CONSTRUCTION!
- DURABLE USA-MADE STEEL ENSURES YEARS OF RELIABLE USE!
- ESSENTIAL TOOL FOR BUILDING EFFICIENT CATERPILLAR GREENHOUSES!
Bootstrap Farmer Spring Wire PVC Coated, 10 Pack, Greenhouse Film Spring Lock for Attachment of Plastic Poly Film and Shade Cloth
-
EFFORTLESSLY SECURES POLY FILM WITH WIGGLE INSTALLATION DESIGN.
-
DURABLE PVC COATING PREVENTS TEARS FOR LONG-LASTING USE.
-
6.5 FT. REUSABLE WIRE FOR VERSATILE GREENHOUSE APPLICATIONS.
To use Bootstrap with Next.js, you need to follow these steps:
- Install Bootstrap: First, you need to install Bootstrap in your Next.js project. Open the terminal and navigate to your project directory. Run the following command to install Bootstrap using npm (Node Package Manager): npm install bootstrap
- Import Bootstrap CSS: Next, open your pages/_app.js file. If it doesn't exist, create one in the pages directory. This file is the entry point for your Next.js application. Import the Bootstrap CSS by adding the following line at the top of the file: import 'bootstrap/dist/css/bootstrap.min.css';
- Add Bootstrap Components: Now you can use any Bootstrap component in your Next.js project. Bootstrap provides a wide range of pre-built UI components like buttons, forms, navigation bars, etc. Import and use these components in your React components as needed. import { Button, Card } from 'react-bootstrap'; const MyComponent = () => { return ( Hello, Bootstrap!This is an example of a Bootstrap Card component. Click me); }; export default MyComponent;
- Customize Bootstrap: If you want to customize the Bootstrap theme or override default Bootstrap styles, create a new file named _custom.scss in the styles directory of your Next.js project. Add your custom styles in this file. Import this file in your _app.js file before importing the Bootstrap CSS: import '../styles/_custom.scss'; Note: Make sure you have set up the necessary tools (such as SASS) to compile and process the custom SCSS file, as Next.js doesn't handle it out of the box.
That's it! You have now successfully integrated Bootstrap with Next.js and can start using its powerful UI components in your project. Remember to check the Bootstrap documentation for information on specific components and their usage.
How to enable responsive design with Bootstrap in next.js?
To enable responsive design with Bootstrap in Next.js, you can follow these steps:
- Install the required packages: npm install bootstrap react-bootstrap sass
- Create a new file named _app.js in your project's pages directory (if it doesn't already exist).
- Import the necessary Bootstrap components and CSS in the _app.js file: import 'bootstrap/dist/css/bootstrap.min.css'; import 'bootstrap/dist/js/bootstrap.bundle.min.js'; import '../styles/custom.scss';
- Create a new directory named styles in the root of your project, if it doesn't already exist.
- Inside the styles directory, create a new file named custom.scss.
- In the custom.scss file, you can override Bootstrap variables or add your custom styles. For example, you can modify the default breakpoints or define custom media queries. Here's an example of increasing the default media breakpoints: /* Override Bootstrap breakpoints */ $grid-breakpoints: ( xs: 0, sm: 576px, md: 768px, lg: 992px, xl: 1200px, );
- Next, you need to import the custom.scss file in your project. Open the next.config.js file located in the root directory, and add the following code: const withSass = require('@zeit/next-sass'); module.exports = withSass({ cssModules: true, cssLoaderOptions: { importLoaders: 1, localIdentName: '[local]___[hash:base64:5]', }, });
- At this point, you can use Bootstrap components in your Next.js pages by simply importing them as needed. For example, you can create a responsive navbar using Bootstrap: import { Navbar, Nav } from 'react-bootstrap'; const CustomNavbar = () => { return ( My WebsiteHomeAboutContact); }; export default CustomNavbar; You can also use Bootstrap's grid system and responsive classes in your JSX code to create responsive layouts.
That's it! You've now enabled responsive design with Bootstrap in your Next.js project. You can customize Bootstrap further by modifying the imported styles or overriding Bootstrap variables.
What is the procedure to add Bootstrap pagination in next.js?
To add Bootstrap pagination in Next.js, you can follow these steps:
-
Install the required dependencies by running the following command: npm install react-bootstrap bootstrap
-
Import the necessary component and styles in your Next.js file. For example, you can create a new file called Pagination.js in the components directory and add the following code: import React from "react"; import Pagination from "react-bootstrap/Pagination"; import "bootstrap/dist/css/bootstrap.min.css"; const CustomPagination = () => { return ( {/* Pagination links go here */} ); }; export default CustomPagination;
-
Use the CustomPagination component in your Next.js page. For example, in your pages/index.js file, import and render the CustomPagination component: import CustomPagination from "../components/Pagination"; const Home = () => { return (
{/* Other content */}
); }; export default Home;
-
Customize and add the necessary Bootstrap pagination links and styles inside the Pagination component in Pagination.js. For example, you can add the following code to create a basic pagination with three pages: const CustomPagination = () => { return ( {1}{2}{3}); };
-
Build and run your Next.js application to see the Bootstrap pagination in action: npm run build npm run start
This procedure will add Bootstrap pagination to your Next.js project and provide you with a basic setup. You can further customize the pagination links and styles as per your requirements.
What is the purpose of using Bootstrap with next.js?
Using Bootstrap with Next.js has several purposes:
- Rapid Prototyping: Bootstrap provides a wide range of pre-built CSS components and JavaScript plugins, allowing developers to quickly build visually appealing web interfaces without having to write custom styles from scratch. This can significantly speed up the development process and help in creating prototypes or initial versions of the application.
- Responsive Design: Bootstrap is designed with a mobile-first approach, meaning that it provides responsive grids and components that automatically adjust to different screen sizes and devices. By using Bootstrap in Next.js, developers can easily create a responsive layout that looks great on various devices, improving the user experience.
- Consistency: Bootstrap encourages a consistent and unified design language by providing a set of standardized CSS classes and components. By integrating Bootstrap in Next.js, developers can ensure that their application's UI remains consistent across different screens and interactions.
- Community and Documentation: Bootstrap has a large and active community with extensive documentation, code examples, and support. Integrating Bootstrap with Next.js allows developers to leverage this community and easily find solutions to common design and development challenges.
- Customization: Bootstrap provides a variety of customization options, allowing developers to tailor the framework according to their specific project requirements. With Next.js, developers can modify and extend Bootstrap's components, styles, and functionality to create a unique and branded user interface.
Overall, integrating Bootstrap with Next.js simplifies the development process, provides a solid foundation for front-end design, and facilitates the creation of highly responsive and visually appealing web applications.
How to customize Bootstrap components in next.js?
To customize Bootstrap components in a Next.js project, you can follow these steps:
- Install Bootstrap: First, install Bootstrap in your Next.js project by running the following command in your project directory:
npm install bootstrap
- Create a Custom Bootstrap SCSS file: In your Next.js project, create a new SCSS file (e.g., custom-bootstrap.scss) where you can define your custom styles for Bootstrap components. In this file, you can override any Bootstrap variables or add additional styles as per your requirements.
- Import Bootstrap SCSS and Custom SCSS files: In your Next.js project, create a custom _app.js file in the pages directory (if you haven't already). Import the Bootstrap SCSS file and your custom SCSS file in the _app.js file as follows:
import 'bootstrap/dist/css/bootstrap.min.css'; import '../path/to/custom-bootstrap.scss';
- Use Bootstrap components in your Next.js project: You can now use Bootstrap components in your Next.js components. For example, in a Next.js component, you can use a Bootstrap button like this:
import React from 'react'; import { Button } from 'react-bootstrap';
const CustomButton = () => { return ; };
export default CustomButton;
- Customize Bootstrap variables: You can further customize Bootstrap variables by modifying the variables in your custom-bootstrap.scss file. For example, to change the primary color, you can override the $primary variable like this:
$primary: #ff0000;
- Restart Next.js development server: After making any changes, make sure to restart the Next.js development server for the changes to take effect.
By following these steps, you can customize Bootstrap components in your Next.js project by adding your own styles and overriding Bootstrap variables according to your project's requirements.
What is the recommended approach to use Bootstrap grids in next.js?
To use Bootstrap grids in Next.js, you need to follow these steps:
-
Install Bootstrap: Install Bootstrap using npm or yarn by running the following command in your project's root folder: npm install bootstrap yarn add bootstrap
-
Import Bootstrap CSS: Next.js allows you to import CSS files in the global scope, making it available to all components. Create a _app.js file in the pages directory (if it does not exist) and import the Bootstrap CSS in it. import 'bootstrap/dist/css/bootstrap.css' function MyApp({ Component, pageProps }) { return } export default MyApp
-
Use Bootstrap classes: You can now use Bootstrap classes and grid system in your components. Create your layout using the Bootstrap grid classes like container, row, and col. import React from 'react' function MyComponent() { return (
{/* Content for the first column */}
{/* Content for the second column */}
) } export default MyComponent You can now use the grid system provided by Bootstrap to create responsive layouts in your Next.js application. Make sure to refer to Bootstrap's official documentation for more detailed information on using their grid system.
What is the technique to add Bootstrap buttons in next.js?
To add Bootstrap buttons in Next.js, you can follow these steps:
- Install Bootstrap package: Open the terminal and navigate to your Next.js project directory. Then run the following command to install Bootstrap as a dependency: npm install bootstrap
- Import Bootstrap styles: In your Next.js project, create a new file, e.g., _app.js inside the pages directory (if it doesn't exist already). Inside this file, import the Bootstrap CSS by adding the following code: import 'bootstrap/dist/css/bootstrap.css';
- Use Bootstrap buttons: Now, you can use Bootstrap buttons in your Next.js components. For example, in your component's JSX code, you can add a button like this: import React from 'react'; import 'bootstrap/dist/css/bootstrap.css'; const MyComponent = () => { return ( Click me!); }; export default MyComponent;
By following these steps, you will be able to add and style Bootstrap buttons in your Next.js application.
What is the recommended way to use Bootstrap grid system in next.js?
The recommended way to use Bootstrap's grid system in Next.js is by installing the Bootstrap framework as a dependency in your project.
-
Install Bootstrap: Open your terminal and navigate to your Next.js project directory. Run the following command to install Bootstrap using npm: npm install bootstrap
-
Import Bootstrap into your Next.js project: Open your _app.js file, which is located in the pages directory. Import the Bootstrap stylesheet by adding the following line at the top of the file: import 'bootstrap/dist/css/bootstrap.min.css';
-
Use the Bootstrap grid system: You can now use the Bootstrap grid system in your components. Bootstrap provides container, row, and column classes which allow you to create responsive layouts. Here's an example of how you can use the grid system in a component: import React from 'react'; import { Container, Row, Col } from 'react-bootstrap'; const MyComponent = () => { return (
Left Column
Right Column
); }; export default MyComponent; In this example, the Container component creates a fixed-width container for the grid system. The Row component is used to create a row, and the Col component defines the columns within the row. The sm={6} prop specifies that each column should take up 50% of the width on small screens and above.
That's it! You can now use the Bootstrap grid system in your Next.js project by following these steps.