Best Helm Hooks Tools to Buy in July 2026
MARSHALLTOWN Tool Hook, Convenient Hand Tool Organization Solution, Made in The USA, 14289
- COMPACT DESIGN EASILY ATTACHES TO TOOL BELTS FOR QUICK ACCESS.
- STURDY CROSS SECTION SECURELY HOLDS A VARIETY OF HAND TOOLS.
- PROUDLY MADE IN THE USA FOR QUALITY YOU CAN TRUST.


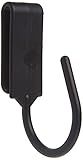
Boat Hook Holder, Black Rubber Quick Release Pole/Oar Holders For Tools & Equipment Size 3/4'' To 2'' In Diameter, to Fix and Store Oars/Poles/Tools/Sporting Goods Boat Hook Oar Spring Clips (4 Pack)
- SECURE STORAGE: C-SHAPE DESIGN KEEPS OARS STABLE AGAINST IMPACTS.
- VERSATILE FIT: ADJUSTABLE STRAPS FOR VARIOUS POLE SIZES AND TOOLS.
- EASY MOUNTING: QUICK INSTALLATION ON ANY HORIZONTAL OR VERTICAL SURFACE.
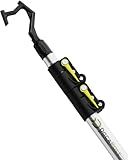
Booms Fishing Hook & Wire Cutter: Upgraded Handle, Cuts Thick Hooks & Bolts - XW43 8.8" Heavy-Duty Fishing Tool
-
EFFORTLESSLY CUTS TOUGH MATERIALS LIKE WIRE, HOOKS, AND BOLTS.
-
NEW COMFORT-GRIP HANDLE REDUCES FATIGUE FOR EASY ONE-HANDED USE.
-
DURABLE DESIGN ENSURES DECADES OF RELIABLE, HEAVY-DUTY PERFORMANCE.
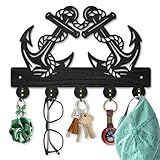
MAYJOYDIY Anchor Helm Wood Key Holder for Wall Nautical Sailor Rope Wall Mounted Key Hooks 11.8×7.9inch Coat Hanger Rack with 5 Alloy Hooks for Entryway Front Door Kitchen Office Decoration
- NAUTICAL DESIGN ADDS CHARM, PERFECT FOR SAILOR-THEMED DECOR!
- SPACE-SAVING FUNCTIONALITY FOR ORGANIZED ENTRYWAYS AND HOMES.
- A THOUGHTFUL GIFT IDEA FOR COUPLES AND LOVED ONES TO CHERISH.
Kraft Tool CF011 Float Hook
- COMPACT SIZE (14.986 CM) SUITS ALL YOUR UTILITY NEEDS EFFORTLESSLY!
- PREMIUM QUALITY UTILITY HOLSTER FROM THE USA FOR RELIABLE USE.
- ONE VERSATILE POUCH, PERFECT FOR CARRYING ESSENTIALS ON THE GO!
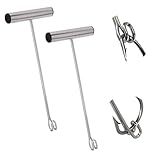
2 Pack Stainless Steel Fishing Hook Remover,Push/Pull Hook Remover,Dehooker Tool,Anti-Lost Saltwater Dehooker Tool Shark Hook Remover (12")
-
EFFORTLESSLY REMOVE HOOKS WITHOUT HARMING FISH-INNOVATIVE DUAL-CURVE DESIGN.
-
DURABLE STAINLESS STEEL ENSURES LONG-LASTING, CORROSION-RESISTANT RELIABILITY.
-
CONVENIENT ONE-HANDED OPERATION PERFECT FOR LARGE FISH SPECIES.
DOCA Boat Hook - 5-12 Ft - Christmas Light Pole Hanger Tool - Durable & Lightweight Utility Hook for Docking, Tree Debris Removal - Plastic
- LIGHTWEIGHT DURABILITY: POLYPROPYLENE DESIGN ENSURES EASY HANDLING.
- EXTENDED REACH: TELESCOPES FROM 5 TO 12 FEET; REACHES 18 FEET SAFELY.
- VERSATILE DUAL-TIP: STRAIGHT AND MULTI-ANGLE TIPS FOR VARIOUS TASKS.
BRAVESHINE Adhesive Tape - 16PCS Hook and Loop Fasteners - Double Sided Adhesive Pads - Rug Carpet Gripper Mounting Tape for Wall Decorations or Tools Hanging - Round 2 inch
-
STRONG GRIP: 2-INCH TAPE HOLDS LIGHTWEIGHT ITEMS SECURELY.
-
VERSATILE USE: IDEAL FOR CRAFTS, ORGANIZATION, AND OUTDOOR PROJECTS.
-
EASY REMOVAL: PEEL OFF WITHOUT DAMAGE, PERFECT FOR ANY SURFACE.
Helm hooks are a useful feature in Helm, which is a package manager for Kubernetes. They enable you to execute certain actions at specific points during the deployment or upgrade process of a Helm release. Hooks can be used to perform various tasks such as initializing a database, running migrations, or updating configurations.
To use Helm hooks, you need to define them in the Helm chart's templates/hooks directory. Each hook is a YAML file that specifies a name and a set of actions to be executed. The possible hook types are:
- Pre-install: Executes actions before a chart is installed.
- Post-install: Executes actions after a chart is installed.
- Pre-upgrade: Executes actions before a chart is upgraded.
- Post-upgrade: Executes actions after a chart is upgraded.
- Pre-delete: Executes actions before a release is deleted.
- Post-delete: Executes actions after a release is deleted.
Within each hook, you can define one or more Kubernetes resources or commands to be run. These resources could be pods, deployments, or any other Kubernetes object. Commands can be shell commands or scripts to run.
Helm ensures that hooks are executed at the appropriate time during the release lifecycle. For example, pre-install hooks are executed before any installation, while post-install hooks are run immediately after the installation completes. Hooks are coordinated with other resources in the Helm chart, so you can reference services, secrets, or other components within your hooks.
Hooks also have a configurable ordering mechanism, allowing you to specify the order in which they should be executed. They can have dependencies on other hooks, enabling you to ensure the necessary prerequisites are fulfilled before executing a hook.
Helm hooks provide a flexible and powerful way to customize and automate deployment operations in a Helm chart. They help manage the complete lifecycle of a release by enabling you to perform tasks at specific points, making Helm an even more versatile tool for deploying applications on Kubernetes.
What is a Helm post-installation hook used for?
A Helm post-installation hook is used to run commands or scripts after a Helm chart has been installed or upgraded. It allows users to perform additional configuration or setup tasks that are necessary after the deployment of a chart.
Post-installation hooks can be defined in the Helm chart's templates directory as YAML files with a .yaml extension. These files contain a post-install section that specifies the commands or scripts to be executed.
Some common use cases for post-installation hooks include:
- Running database migrations: After a database is deployed, a post-installation hook can be used to execute database schema migrations or other necessary setup commands.
- Setting up secrets: Post-installation hooks can be used to generate or fetch secrets required by the application, such as API keys or authentication certificates.
- Initializing data: If the application requires some initial data to be populated in the database or other external systems, it can be done through a post-installation hook.
- Integration with external systems: Hooks can be used to configure various integrations with external systems like monitoring tools, logging platforms, or messaging services.
By using post-installation hooks, Helm allows you to automate various tasks that are crucial for the proper functioning of your application and environment.
What is the syntax for defining a Helm post-upgrade hook?
To define a Helm post-upgrade hook, you need to specify it in your Helm chart's templates/ directory with a YAML file. The syntax for defining a post-upgrade hook is as follows:
apiVersion: batch/v1
kind: Job
metadata:
name: {{ include "
This example syntax defines a Kubernetes Job that will be executed as a post-upgrade hook. You can modify this YAML to suit your specific post-upgrade actions or requirements. Ensure to replace <CHART-NAME> with the actual name of your Helm chart.
Once you have defined the post-upgrade hook YAML file, Helm will execute it after an upgrade is performed on your release.
How to log output from Helm hooks?
To log the output from Helm hooks, you can follow these steps:
- Open the Helm chart you want to log the hook output for.
- Navigate to the templates directory.
- Locate the file containing the hook you want to log the output for (e.g., pre-install.yaml, post-upgrade.yaml).
- Add a {{- printf " logs:\n" | comment }} line at the beginning of the hook YAML file, where is the name of the hook (e.g., pre-install, post-upgrade).
- Add a command that captures the output and appends it to a log file. For example, you can redirect the output of a command to a log file as shown below:
{{- printf "
- name: {{ .Chart.Name }} image: "{{ .Values.image.repository }}:{{ .Values.image.tag }}" command: ["sh", "-c", "echo 'Hook output' >> /path/to/logfile"] ...
- Update the command executing your hook to log the output. For example, replace the exec line with the command line shown above.
- Save the modifications and run your Helm deployment commands (e.g., helm install, helm upgrade) as usual.
- After executing the hooks, you can check the logs of the corresponding pods to see the output. Use the following command to retrieve the logs:
kubectl logs
Replace <pod-name> with the name of the pod where the hook executed, and <namespace> with the namespace where the pod is deployed.
By following these steps, you should be able to log the output from Helm hooks efficiently.
How to pass variables to Helm hooks?
To pass variables to Helm hooks, you can make use of the --set flag or the values.yaml file.
- Using the --set flag: When invoking the helm install or helm upgrade commands, you can use the --set flag to pass variable values directly. For example, to pass a variable named myVar with a value of foo, you can use the following command: helm install mychart ./mychart --set myVar=foo This will make the myVar variable available to the hooks defined in your Helm chart.
- Using the values.yaml file: Alternatively, you can use the values.yaml file to define your variables. Open the values.yaml file in your Helm chart and add your variable with its desired value. For example: hooks: myHook: myVar: foo In your hook template, you can access the value using .Values.hooks.myHook.myVar. Place your hook template under the hooks/ directory within your Helm chart.
By using either of these approaches, you can pass variables to Helm hooks and use them inside your hook templates.
What is the syntax for defining a Helm pre-deletion hook?
The syntax for defining a pre-deletion hook in Helm is as follows:
apiVersion: batch/v1
kind: Job
metadata:
name: {{ include "
To define a pre-deletion hook, you need to create a Job Kubernetes resource with the metadata.annotations["helm.sh/hook"] set to pre-delete. This annotation informs Helm that this Job is a pre-deletion hook.
In the metadata.name field, you can use the Helm template {{ include "<release-name>.fullname" . }} to generate a unique name for the pre-deletion hook. Replace <release-name> with the actual name of your Helm release.
You can set optional annotations like helm.sh/hook-delete-policy to control the deletion order. The value before-hook-creation ensures the hook is deleted after it is executed.
The Job's spec should contain at least one container. Specify the image to use for running the pre-deletion hook script in the spec.template.spec.containers section. Set the command field to the command or script that needs to be executed as a pre-deletion hook.
Finally, the restartPolicy is set to Never to ensure that the Job is not restarted if it fails to complete successfully.
Make sure to replace <image-name> and <command-to-execute-pre-deletion> with the actual image name and command/script you want to run as a pre-deletion hook.