Best Swift Programming Guides to Buy in February 2026
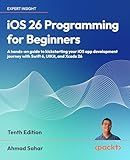
iOS 26 Programming for Beginners: A hands-on guide to kickstarting your iOS app development journey with Swift 6, UIKit, and Xcode 26


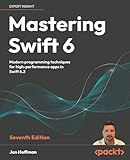
Mastering Swift 6: Modern programming techniques for high-performance apps in Swift 6.2


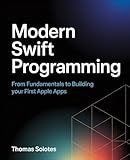
Modern Swift Programming: From Fundamentals to Building Your First Apple Apps


Swift Programming: A Detailed Guide to Learning Essential Concepts and Mastering Advanced Techniques


iOS 18 Programming for Beginners: Learn iOS development with Swift 6, Xcode 16, and iOS 18 - your path to App Store success



Swift Programming for Beginners


Learning Swift: Building Apps for macOS, iOS, and Beyond


Swift Cookbook: Proven recipes for developing robust iOS applications with Swift 5.9


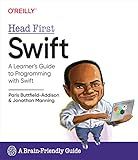
Head First Swift: A Learner's Guide to Programming with Swift


In Swift, an if-let statement is used for safely unwrapping optional values. It combines the if statement and optional binding into a single line of code. The syntax for using if-let statements is as follows:
if let unwrappedValue = optionalValue { // If the optional value is successfully unwrapped, execute this block of code // You can now use the unwrappedValue without needing to use optional chaining or force unwrapping } else { // If the optional value is nil, execute this block of code }
By using if-let statements, you can safely access the value of an optional variable without the risk of causing a runtime error if the optional variable is nil. It helps in writing cleaner and safer code by handling optional values in a more concise and efficient way.
How to safely unwrap optionals using if-let statements in Swift?
To safely unwrap optionals using if-let statements in Swift, follow these steps:
- Use the if-let statement with optional binding to check if an optional contains a value and safely unwrap it if it does.
For example:
// Optional variable let optionalInt: Int? = 10
// Check if optionalInt contains a value and unwrap it safely if let unwrappedInt = optionalInt { print("Unwrapped value: \(unwrappedInt)") } else { print("Optional is nil") }
- Inside the if-let block, you can use the unwrapped value (in this case unwrappedInt) without having to explicitly unwrap it using force unwrapping (!).
- If the optional does not contain a value, the else block will be executed.
By using if-let statements to safely unwrap optionals, you can prevent runtime crashes that can occur when force unwrapping optionals without checking for nil first.
How to use if-let statements in a conditional statement in Swift?
In Swift, the if-let statement is used to safely unwrap an optional value and bind it to a new constant or variable. You can use if-let statements in conditional statements to check if an optional contains a value and then perform some action based on that value.
Here is an example of how to use if-let in a conditional statement:
// Optional value let optionalValue: Int? = 5
// Checking if the optional value contains a value using if-let if let unwrappedValue = optionalValue { // Value was successfully unwrapped print("The unwrapped value is: \(unwrappedValue)") } else { // Value was nil print("The optional value is nil") }
In the above example, the if let unwrappedValue = optionalValue statement checks if the optionalValue contains a value. If it does, the value is unwrapped and bound to the constant unwrappedValue. You can then use unwrappedValue within the scope of the if-let statement. If the optional value is nil, the code within the else block will be executed.
What is the difference between if-let and guard-let statements in Swift?
if-let and guard-let are both optional binding statements in Swift that allow you to safely unwrap optional values. The main difference between the two is in how they handle the unwrapping process:
- if-let: The if-let statement unwraps an optional value and assigns it to a new constant or variable within the scope of the if statement. If the optional value is nil, the code inside the if statement block will not be executed.
Example:
if let unwrappedValue = optionalValue { // code to execute if unwrapping is successful } else { // code to execute if unwrapping is unsuccessful }
- guard-let: The guard-let statement also unwraps an optional value and assigns it to a new constant or variable, but unlike if-let, the unwrapped value is available for the rest of the current scope. If the optional value is nil, the code inside the guard statement block must exit the current scope, typically using a return, break, continue, or throw statement.
Example:
guard let unwrappedValue = optionalValue else { // code to execute if unwrapping is unsuccessful // exit the current scope return } // code to execute if unwrapping is successful
In general, if-let is used when you want to conditionally execute code based on the presence of an optional value, while guard-let is used when you want to unwrap an optional value early in your code and handle failures quickly.
How to gracefully handle optional values using if-let statements in Swift?
One way to gracefully handle optional values in Swift is to use if-let statements. Here's an example of how you can use if-let statements to safely unwrap an optional value:
var optionalValue: Int? = 5
if let unwrappedValue = optionalValue { // Optional value is not nil print("Unwrapped value is: \(unwrappedValue)") } else { // Optional value is nil print("Optional value is nil") }
In this example, the if-let statement checks if the optionalValue is not nil. If it is not nil, the value is unwrapped and assigned to unwrappedValue, and you can safely use it within the if block. If the optionalValue is nil, the else block is executed.
Using if-let statements can help you safely handle optional values without the risk of force unwrapping and causing a runtime crash. It's a more elegant and safe way to work with optional values in Swift.
What is the difference between nil, optional, and unwrapped values in Swift?
In Swift, nil, optional, and unwrapped values are related concepts but have different characteristics:
- Nil: Nil is a special value in Swift that represents the absence of a value. It is used to indicate that a variable or constant does not currently have a value assigned to it. Nil is commonly used with optional types in Swift.
- Optional: An optional type in Swift is used to represent a value that may or may not be present. Optional types are declared by appending a question mark "?" to the type declaration. This allows variables or constants to have a value or be nil. Optional types ensure that you handle the possibility of nil values in your code, preventing potential runtime errors.
- Unwrapped Values: To access the value of an optional type, you need to unwrap it. Unwrapping an optional type means extracting the underlying value if it exists. There are different ways to unwrap optional values in Swift, such as using if let, guard let, forced unwrapping (!), or optional chaining (?.). Unwrapping optional values safely ensures that you only access the value if it is not nil, thus preventing runtime crashes.
