Best Mirrorless Cameras for Manual Mode to Buy in July 2026
Canon EOS R50 Mirrorless Camera RF-S18-45mm F4.5-6.3 is STM Lens Kit, 24.2 Megapixel CMOS (APS-C) Sensor, 4K Video, Hybrid Camera, Photo and Video, Vlogging, Content Creator, RF Mount, Black
-
STUNNING 24.2 MP CLARITY WITH DIGIC X PROCESSOR FOR VIBRANT IMAGES.
-
CAPTURE FAST ACTION AT UP TO 15 FPS-PERFECT FOR DYNAMIC VLOGS!
-
DUAL PIXEL AF II OFFERS 651 ZONES FOR PRECISE SUBJECT TRACKING.


Nikon Z50 II with Two Lenses | Compact mirrorless Stills/Video Camera with Easy Color presets and Wireless Photo Sharing | USA Model
- UNMATCHED SENSOR QUALITY: CAPTURE STUNNING DETAILS WITH 20.9 MP SENSOR.
- CREATIVE CONTROL: EXPLORE 31 PRESETS FOR UNIQUE PHOTOS AND VIDEOS.
- SMART FOCUS TRACKING: AUTOMATICALLY DETECT AND TRACK 9 SUBJECTS EFFORTLESSLY.
Canon EOS Rebel T7 DSLR Camera with 18-55mm Lens | Built-in Wi-Fi | 24.1 MP CMOS Sensor | DIGIC 4+ Image Processor and Full HD Videos
- CAPTURE STUNNING IMAGES WITH A 24.1MP APS-C SENSOR!
- EFFORTLESS SHARING VIA BUILT-IN WI-FI AND NFC TECHNOLOGY!
- TRANSFORM YOUR CANON INTO A HIGH-QUALITY WEBCAM EFFORTLESSLY!
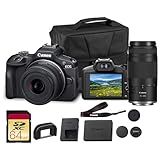
Canon EOS R100 Mirrorless Camera Double Lens Kit with RF-S 18-45mm and RF 75-300mm Lenses | Compact 24.2MP APS-C Camera with 4K Video, Dual Pixel Autofocus with Bag and 64GB Card
-
VERSATILE LENS KIT: INCLUDES WIDE-ANGLE & TELEPHOTO LENSES FOR ALL SCENARIOS.
-
24.2MP APS-C SENSOR: CAPTURE STUNNING DETAILS AND VIBRANT COLORS EASILY.
-
LIGHTWEIGHT & PORTABLE: EASY TO CARRY FOR TRAVEL, EVENTS, AND EVERYDAY USE.
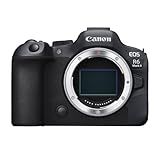
Canon EOS R6 Mark II Mirrorless Camera (Body Only), Full-Frame Camera, 24.2 Megapixel CMOS Sensor, Photo and Video Capabilities, Black
- CAPTURE STUNNING LOW-LIGHT IMAGES WITH 24.2 MP FULL-FRAME SENSOR.
- ACHIEVE SHARP, HIGH-RESOLUTION PHOTOS AND VIDEOS WITH DIGIC X PROCESSOR.
- EFFORTLESSLY TRACK ACTION WITH 40 FPS CONTINUOUS SHOOTING CAPABILITY.
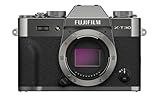
FUJIFILM X-T30 III Mirrorless Camera Body, Charcoal Silver
- EFFORTLESS SHOOTING WITH AUTO MODE, FOCUS ON YOUR MOMENT.
- UNLEASH CREATIVITY: 20 UNIQUE FILM SIMULATIONS AWAIT!
- COMPACT ELEGANCE: TIMELESS DESIGN, EASY TO CARRY ANYWHERE.
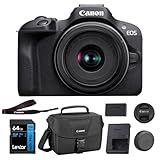
Canon EOS R100 Mirrorless Camera with RF-S18-45mm F4.5-6.3 IS STM Lens Kit, 24.1 Megapixel CMOS (APS-C) Sensor, 4K Video, RF Mount | Black Bundled with 64GB Memory Card & Camera Shoulder Bag (3 Items)
- CAPTURE STUNNING DETAILS: 24.1MP SENSOR FOR SUPERBLY CLEAR IMAGES.
- ULTIMATE PORTABILITY: COMPACT, LIGHTWEIGHT DESIGN FOR EASY MOBILITY.
- PRO-LEVEL VIDEO: SHOOT 4K AND HD AT IMPRESSIVE FRAME RATES EFFORTLESSLY.
Using manual mode on a mirrorless camera allows you to have full control over your settings, such as aperture, shutter speed, and ISO. To use manual mode, start by adjusting your aperture to control the amount of light that enters the camera. A lower f-stop number means a wider aperture, letting in more light. Next, adjust your shutter speed to control how long the shutter remains open. A slower shutter speed lets in more light but may cause motion blur. Finally, adjust your ISO to control the camera's sensitivity to light. A higher ISO allows for better low-light performance but may introduce noise. Experiment with different settings to find the perfect balance for your shot.
How to adjust metering mode in manual mode on a mirrorless camera?
To adjust the metering mode in manual mode on a mirrorless camera, you will need to access the camera's menu settings. Here is a general guide on how to do this:
- Turn on your mirrorless camera and switch to manual mode.
- Press the Menu button on your camera to access the menu settings.
- Navigate to the "Metering Mode" or "Exposure Metering" option in the menu.
- Select the desired metering mode option (such as evaluative, center-weighted, or spot metering).
- Press the Set or OK button to confirm your selection.
- Exit the menu settings by pressing the Menu button again.
Please note that the specific steps may vary depending on the make and model of your mirrorless camera. Refer to your camera's user manual for detailed instructions on how to adjust the metering mode in manual mode.
How to adjust aperture in manual mode on a mirrorless camera?
To adjust aperture in manual mode on a mirrorless camera, follow these steps:
- Turn on your camera and switch it to manual mode. This may be denoted by "M" on the mode dial.
- Locate the control dial or buttons on your camera that are used to adjust aperture. On most mirrorless cameras, you can use the rear control dial or a dedicated aperture dial on the camera body.
- Use the control dial to adjust the aperture value. Rotating the dial to the right will increase the aperture size (lower f-stop number), allowing more light to enter the camera. Rotating the dial to the left will decrease the aperture size (higher f-stop number), letting in less light.
- As you adjust the aperture, you will see the changes reflected on the camera's LCD screen or electronic viewfinder in real-time. This will show you how the adjusted aperture affects the exposure of your image.
- Take test shots and review the results to see how changing the aperture affects the depth of field and overall image quality.
- Experiment with different aperture settings to achieve the desired effect in your photos. Remember, a larger aperture (lower f-stop number) will give you a shallower depth of field, while a smaller aperture (higher f-stop number) will give you a greater depth of field.
What is the touch screen functionality on a mirrorless camera?
The touch screen functionality on a mirrorless camera allows the user to interact with the camera's settings, menus, and controls by touching the screen directly. This makes it more intuitive and user-friendly to navigate through the camera's features and settings. Users can tap on icons, swipe through menus, select focus points, and even take photos by simply touching the screen. It provides a more responsive and convenient way to control the camera compared to using physical buttons and dials.
How to use manual flash on a mirrorless camera?
- Attach the manual flash to the hot shoe mount on your mirrorless camera.
- Set your camera to Manual (M) mode.
- Set your camera's shutter speed to the maximum flash sync speed (usually around 1/200 or 1/250 sec).
- Set your camera's aperture to an appropriate setting based on the flash output and the desired depth of field.
- Set your camera's ISO to the desired sensitivity, taking into account the available light and the flash output.
- Turn on the manual flash and set the power output to the desired level. This can be done using the controls on the flash unit itself.
- Take a test shot and adjust the flash power as needed to achieve the desired exposure.
- Experiment with different angles and distances to see how they affect the lighting of your subject.
- Remember to compensate for any light modifiers or filters that may affect the flash output.
- Practice and experiment with different settings to become more comfortable and proficient with using manual flash on your mirrorless camera.
How to set up back button focus on a mirrorless camera?
- Turn on your mirrorless camera and navigate to the menu settings.
- Look for the custom settings or controls menu.
- Find the option for assigning a function to a button or setting up custom controls.
- Select the function you want to assign back button focus to (usually labeled as AF-ON or AF-L).
- Choose the back button focus option from the menu.
- Press the button you want to use for back button focus (usually the AE-L/AF-L button on mirrorless cameras).
- Save your settings and exit the menu.
Now, when you press the assigned button, the camera will focus without having to half-press the shutter button. This allows you to separate focusing and shutter release functions, giving you more control over your focusing process.
How to use multiple exposure mode on a mirrorless camera?
To use multiple exposure mode on a mirrorless camera, follow these steps:
- Set your camera to multiple exposure mode. This can usually be done by accessing the shooting menu on your camera and selecting the multiple exposure mode option.
- Choose the number of exposures you want to combine. Some cameras allow you to select the number of exposures you want to combine, while others may automatically set this to 2 or 3 exposures.
- Frame your shot and take the first exposure. Make sure to compose your shot carefully and take the first exposure.
- Take the second exposure. After taking the first exposure, do not advance to the next frame. Instead, take the second exposure while still in multiple exposure mode. The camera will then combine the two exposures into a single image.
- Review and adjust settings if needed. Once you have taken the multiple exposure shot, review the image on your camera’s LCD screen. If needed, you can adjust settings such as exposure compensation or ISO before taking additional exposures.
- Repeat the process as desired. You can continue to take multiple exposures by following the same steps outlined above. Experiment with different compositions and settings to create unique and artistic multiple exposure images.