Best Wireless Printers to Connect to Buy in July 2026
HP DeskJet 2827e Wireless All-in-One Color Inkjet Printer, Scanner, Copier, Best-for-Home, 3 Month Instant Ink Trial Included, AI-Enabled (6W7F5A)
-
EFFORTLESS WIRELESS PRINTING AND SMART APP CONTROL FROM ANY DEVICE.
-
HIGH-QUALITY, PERFECTLY FORMATTED PRINTS WITH HP AI TECHNOLOGY.
-
ENJOY 3 MONTHS OF FREE INK DELIVERY WITH HP+ ACTIVATION!


Canon MegaTank G3270 All-in-One Wireless Inkjet Printer. for Home Use, Print, Scan and Copy
- UP TO 2 YEARS OF INK INCLUDED-NO MORE FREQUENT PURCHASES!
- PRINT UP TO 6,000 BW & 7,700 COLOR PAGES WITH ONE INK SET!
- SAVE UP TO $1,000 ON INK-BOOST YOUR BUDGET FOR OTHER NEEDS!
HP Envy Inspire 7255e Wireless Color Inkjet Printer, Print, scan, copy, Easy setup, Mobile printing, Best-for-home, 3 month Instant Ink trial included, AI-enabled (1W2Y9A)
-
VIBRANT, BORDERLESS PHOTOS & DOCUMENTS WITH HP AI PRECISION.
-
EASY WIRELESS SETUP & MOBILE PRINTING FOR ULTIMATE CONVENIENCE.
-
SUSTAINABLE DESIGN WITH OVER 45% RECYCLED PLASTIC CONTENT.

HP OfficeJet Pro 8125e Wireless All-in-One Color Inkjet Printer, Print, scan, Copy, ADF, Duplex Printing Best-for-Home Office, 3 Month Instant Ink Trial Included, AI-Enabled (405T6A)
-
FAST PRINTING: UP TO 20 PPM BLACK, 10 PPM COLOR FOR HOME OFFICES.
-
WIRELESS CONNECTIVITY: RELIABLE DUAL-BAND WI-FI FOR EASY PRINTING.
-
HP INSTANT INK: GET INK DELIVERED BEFORE YOU RUN OUT-HASSLE-FREE!
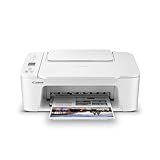
Canon PIXMA TS3720 Wireless All-in-One Printer for Basic Home Printing, White
-
ALL-IN-ONE FUNCTIONALITY: PRINT, COPY, AND SCAN IN ONE COMPACT DEVICE.
-
FAST PRINTING: ENJOY QUICK OUTPUTS AT 7.7PPM FOR BLACK AND 4PPM FOR COLOR.
-
EASY WIRELESS SETUP: CONNECT EFFORTLESSLY TO WI-FI AND PRINT FROM MOBILE DEVICES.
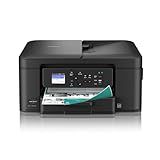
Brother Work Smart 1360 Wireless Color Inkjet All-in-One Printer with Automatic Duplex Printing and 1.8” Color Display | Includes Refresh Subscription Trial(1) (MFC-J1360DW) (Uses LC501 Series Inks)
- ALL-IN-ONE PRINTER: PRINT, COPY, SCAN-PERFECT FOR HOME OFFICES!
- CLOUD-READY: EASILY PRINT AND SCAN FROM POPULAR APPS WITH EASE.
- FAST PRINTING: ENJOY AUTOMATIC DUPLEX & 16 PPM SPEEDS FOR EFFICIENCY.
![Canon Megatank G3290 All-in-One Wireless Supertank [Megatank] Printer | Print, Copy Scan | Mobile Printing |2.7" LCD Color Touchscreen | Auto Duplex](https://cdn.blogweb.me/1/41_S9v_If_HBSL_SL_160_6dd380abc2.jpg)
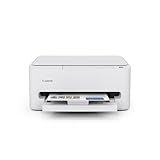
Canon Megatank G3290 All-in-One Wireless Supertank [Megatank] Printer | Print, Copy Scan | Mobile Printing |2.7" LCD Color Touchscreen | Auto Duplex
- PRINT 6,000 B/W & 7,700 COLOR PAGES WITH INCLUDED INK!
- SAVE UP TO $1,000 ON INK OVER TIME!
- USER-FRIENDLY 2.7” LCD TOUCHSCREEN FOR EASY OPERATION!
Canon PIXMA TS4320 Wireless Color Inkjet Printer for Duplex Printing, White – Cost Efficient Home Printer with Copier/Scanner, Compact Design, Easy Setup, 1 Year Limited Warranty
-
AFFORDABLE ALL-IN-ONE PRINTER FOR HOME AND HYBRID WORK NEEDS.
-
ENJOY VIBRANT, HIGH-QUALITY PRINTS WITH A HYBRID INK SYSTEM.
-
EASY SETUP AND RELIABLE DUAL-BAND WI-FI FOR SEAMLESS PRINTING.
Adding a wireless printer to a Windows 7 computer is a relatively straightforward process. Here are the steps involved:
- Ensure that your wireless printer is turned on and connected to the same Wi-Fi network as your computer.
- Click on the "Start" button on your Windows 7 computer and select "Devices and Printers" from the right-hand menu.
- In the Devices and Printers window, click on the "Add a printer" button located at the top of the window.
- A new window titled "Add Printer" will appear. Here, Windows 7 will search for any available printers on your network.
- After the search is complete, your wireless printer should appear in the list of available devices. Select your printer by clicking on its name and then click on the "Next" button.
- Windows 7 will now install the necessary drivers for your wireless printer. This process might take a few minutes.
- Once the drivers are installed, you will be prompted to give your printer a name. You can choose to keep the suggested name or provide a custom name. Click on the "Next" button.
- In the next window, you will have the option to set your wireless printer as the default printer. If desired, select the checkbox to set it as the default. Click on the "Finish" button to complete the setup process.
- Your wireless printer is now added to your Windows 7 computer. You can test it by printing a document or a test page to ensure it functions properly.
Please note that the exact steps may vary slightly depending on the printer model and brand you have. Make sure to consult the printer's manual or manufacturer's website for any specific instructions.
What is a wireless printer and how does it work?
A wireless printer is a type of printer that can print documents, photos, or any other file without the need for a physical connection to a computer. It uses wireless technology, such as Wi-Fi or Bluetooth, to communicate and receive print commands from devices like computers, laptops, smartphones, or tablets.
Here's how a wireless printer generally works:
- Network Connection: The printer connects to a Wi-Fi network or Bluetooth to establish a wireless connection. This can be done by entering the network credentials directly on the printer or through a setup process using a computer or mobile device.
- Device Discovery: Once connected to the network, the printer broadcasts its availability to other devices on the same network. Devices within the network can then search for and identify the printer.
- Print Command: When you want to print a document, you need to select the wireless printer as the printing option on your device. You can do this by going to the print settings of the document or selecting the printer from a drop-down list.
- Communication: Once the printer receives the print command, it establishes a direct connection with the device. This connection allows the printer to receive the file to be printed.
- Printing: The printer processes the data received and prints the document accordingly. It uses ink cartridges or toner to create the desired printout and delivers it through an output tray.
Wireless printers offer the convenience of printing without the limitations of physical cables, allowing multiple devices to print to a single printer within the same network. They also often support additional features like mobile printing through dedicated apps or cloud printing, enhancing their functionality.
What is the difference between a network printer and a wireless printer in Windows 7?
A network printer and a wireless printer are both types of printers that can be used in a Windows 7 operating system, but they have some differences. Here is a brief explanation of the variations:
- Network Printer: A network printer is connected directly to a network, usually through an Ethernet cable. It is typically located in a fixed place and is accessible to multiple users on the same network. All the computers on the network can send print jobs to the network printer, making it a shared resource. Network printers are identified by their IP address or hostname on the network.
- Wireless Printer: A wireless printer, on the other hand, utilizes a wireless network connection to communicate with computers or devices. It connects to a Wi-Fi network and can be placed anywhere within the range of that network. This allows users to send print jobs wirelessly from any device connected to the same network. Wireless printers can be convenient for homes or small offices where mobility is desired.
In summary, the main difference between a network printer and a wireless printer is the method of connection. A network printer is connected to a network via Ethernet, while a wireless printer communicates with devices over Wi-Fi. Both types provide print capabilities to multiple users but differ in terms of connectivity options.
How to find the IP address of a wireless printer in Windows 7?
To find the IP address of a wireless printer in Windows 7, you can follow these steps:
- Click on the "Start" button and open the "Control Panel".
- Select the "Devices and Printers" option.
- Right-click on the wireless printer you want to find the IP address for and select "Printer Properties".
- In the Printer Properties window, go to the "Ports" tab.
- Look for the port that is check-marked and connected to your wireless printer. It may be named "Standard TCP/IP Port" or something similar.
- Select the port and click on the "Configure Port" button below.
- In the next window, the IP address of the wireless printer will be displayed in the "Printer Name or IP Address" field.
- Take note of the IP address and click "OK" to close the windows.
The IP address you have obtained will be the address of your wireless printer.
How to change the default printer settings in Windows 7 for a wireless printer?
To change the default printer settings in Windows 7 for a wireless printer, you can follow these steps:
- Click on the "Start" button, and open the "Control Panel".
- In the Control Panel, click on "Devices and Printers".
- Right-click on the wireless printer that you want to change the default settings for and select "Printer properties" from the drop-down menu.
- In the printer properties window, you will see several tabs, including "General", "Ports", "Advanced", etc.
- Click on the "Advanced" tab.
- In the Advanced tab, you will find a section called "Printing Defaults". Click on the "Printing Defaults" button.
- Make the desired changes to the default settings such as paper size, orientation, print quality, etc., in the Printing Defaults window.
- Click "Apply" to save the changes, and then click "OK" to close the window.
- You can also go back to the printer properties window and click on the "Preferences" button to change additional printing options specific to the wireless printer.
- Once you have made all the desired changes to the default settings, close the windows.
From now on, any print job sent to the wireless printer from your Windows 7 computer will use the new default settings that you have set.