
Best Subwoofer Calibration Tools to Buy in July 2026
Turntable Strobe Disc - Speed Calibration Tool for Record Players


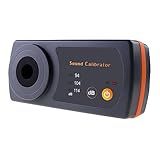
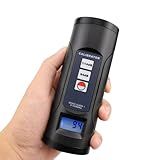
Sound Level Meter Calibrator, Precise Decibel Meter Calibrator with 3 Calibration Level 114dB & 94dB & 104dB, Professional Sound Pressure Level (SPL) Calibrator for Sound Level Meters
-
VERSATILE CALIBRATION: CHOOSE FROM 3 LEVELS FOR PRECISE SOUND MEASUREMENTS.
-
ULTRA-PORTABLE DESIGN: SMALL ENOUGH TO FIT IN POCKETS AND BAGS FOR EASY USE.
-
SMART BATTERY ALERTS: LOW POWER INDICATOR ENSURES YOUR CALIBRATOR IS ALWAYS READY.
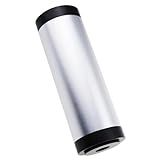
Sound Level Calibrator,Decibel Meter Calibration for Noise Measurement Reader,Output Sound Level 94dB & 114dB output levels for 1 inch and 1/2 inch Microphones
- DUAL OUTPUT LEVELS (94DB & 114DB) FOR VERSATILE SOUND MEASUREMENTS.
- FACTORY CALIBRATED FOR CONFIDENCE; ACCURATE READINGS GUARANTEED.
- UNIVERSAL FIT FOR MICROPHONES, INCLUDING CONVENIENT ½ INCH ADAPTER.
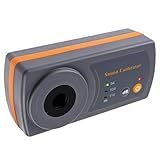
Professional Sound Level Calibrator Decibel Meter Calibration with Three Calibration Level at 94dB & 104dB & 114dB, SPL Meter Calibrator for dB Noise meter
- THREE CALIBRATION LEVELS: 114DB, 104DB, AND 94DB FOR VERSATILITY.
- COMPACT, PORTABLE DESIGN MAKES IT EASY TO CALIBRATE ANYWHERE.
- LED INDICATORS FOR POWER AND CALIBRATION STATUS ENSURE RELIABILITY.
Digital Sound Level Meter Calibrator 94dB & 114dB for 1/2" and 1" inch Microphone, Professional Noise Decibel Calibration Tool Measurement Accuracy Check
-
EASY 3-BUTTON OPERATION: QUICK SETUP WITH JUST THREE SIMPLE BUTTONS.
-
CLEAR BACKLIT DISPLAY: DIGITAL READOUT ENSURES ACCURATE CALIBRATION EVERY TIME.
-
PORTABLE DESIGN: LIGHTWEIGHT AND COMPACT FOR CALIBRATION ON-THE-GO.
Calibrating studio subwoofers for accurate bass response is essential in achieving a well-balanced and clear sound in your mixing or recording environment. To do this, start by setting the volume of the subwoofer to a mid-level position. Then, play some music or soundtracks with a wide frequency range and adjust the crossover frequency on the subwoofer to seamlessly blend with the main speakers. Next, fine-tune the phase control to align the bass frequencies with the rest of the audio spectrum. Finally, experiment with different placement options for the subwoofer in the room to find the optimal position for the most even bass response. By following these steps and using your ears as the ultimate judge, you can effectively calibrate your studio subwoofers for accurate bass reproduction.
How to integrate studio subwoofers with a surround sound system?
To integrate studio subwoofers with a surround sound system, follow these steps:
- Check the compatibility of your studio subwoofers with your surround sound system. Make sure that the subwoofers can be connected to your receiver or amplifier.
- Determine the best placement for your subwoofers. Ideally, they should be placed in different parts of the room to ensure even distribution of bass frequencies.
- Connect the subwoofers to the subwoofer output on your receiver or amplifier using a high-quality audio cable.
- Adjust the crossover frequency on your receiver or amplifier to ensure that the subwoofers are only playing frequencies below a certain point, usually around 80Hz.
- Calibrate the volume level of the subwoofers using the built-in calibration system on your receiver or amplifier, or manually adjust the volume until it blends seamlessly with the other speakers in your surround sound system.
- Test the subwoofers with different types of audio content to ensure that they are providing the desired level of bass without overpowering the rest of the sound system.
- Fine-tune the settings on your receiver or amplifier, as well as the placement of the subwoofers, to achieve the best possible sound quality and balance in your surround sound system.
What is the recommended method for calibrating studio subwoofers in a new room?
The recommended method for calibrating studio subwoofers in a new room is to first place the subwoofer in the position where it will be used. Then, using a sound level meter or calibration microphone, play a test tone through the subwoofer and measure the sound levels at various frequencies.
Next, adjust the crossover frequency and volume levels of the subwoofer to achieve a balanced and accurate sound output. It is important to ensure that the subwoofer is not overpowering the main speakers, but rather complementing them.
Additionally, it may be helpful to use room correction software or tools to account for any acoustical issues in the room that could affect the subwoofer's performance. Taking the time to properly calibrate studio subwoofers in a new room will result in a more accurate and balanced sound reproduction for mixing and mastering purposes.
How to adjust subwoofer phase settings for time alignment in a studio setup?
To adjust subwoofer phase settings for time alignment in a studio setup, follow these steps:
- First, ensure that both your main speakers and subwoofer are properly positioned in your studio setup. The subwoofer should ideally be placed equidistant between the left and right main speakers, and slightly in front of them.
- Play a frequency sweep test tone through your main speakers and subwoofer, and use a measurement microphone or a sound level meter to measure the point at which the frequencies from the speakers and subwoofer align or cancel each other out.
- Adjust the phase settings on the subwoofer to achieve maximum output at the crossover frequency point. This usually involves adjusting the phase knob in small increments (typically 0-180 degrees) until you find the position that results in the most even response across all frequencies.
- Experiment with different phase settings and re-measure the frequency response until you achieve the most accurate and coherent blend between the main speakers and subwoofer. This process may require some trial and error to find the optimal phase setting for your specific setup.
- Once you have achieved optimal time alignment between the main speakers and subwoofer, make sure to double-check the positioning and level matching of all speakers in your studio setup to ensure a balanced and accurate sound reproduction.
By following these steps and fine-tuning the phase settings of your subwoofer, you can achieve improved time alignment and overall sound quality in your studio setup.
What is the difference between sealed and ported subwoofers in a studio setting?
Sealed subwoofers are generally more accurate and have a tighter, more controlled bass response. They are often preferred in studio settings where accurate reproduction of low frequencies is important.
Ported subwoofers, on the other hand, are typically louder and have more pronounced bass output at certain frequencies. They are often chosen for home theater setups or music production where a more powerful and boomy bass is desired.
In a studio setting, the choice between sealed and ported subwoofers ultimately depends on the specific needs and preferences of the user. If accuracy and control are key, a sealed subwoofer may be the better option. If a more powerful and impactful bass response is desired, a ported subwoofer may be preferred.
What is the effect of subwoofer placement near room boundaries on bass response?
When a subwoofer is placed near room boundaries, such as walls or corners, it can have a significant impact on the bass response in the room.
Placing a subwoofer near a boundary can increase bass reinforcement, as the boundary acts as a natural amplifier, reflecting and reinforcing low-frequency sound waves. This can lead to a boost in bass output and create a more powerful and full-bodied sound.
However, placing a subwoofer too close to a boundary can also result in an increase in bass build-up or "boominess". This can cause certain frequencies to be emphasized, resulting in a less balanced and accurate bass response.
Additionally, the placement of a subwoofer near room boundaries can also affect the frequency response and phase alignment of the bass in the room. Careful positioning and experimentation with placement is key to achieving the best bass response in a room.
Ultimately, the effect of subwoofer placement near room boundaries on bass response will depend on the specific characteristics of the room, the subwoofer itself, and personal preferences for sound quality.
How to calibrate studio subwoofers for accurate bass levels in a mix?
Calibrating studio subwoofers for accurate bass levels in a mix is essential for achieving a balanced and full sound. Here are some tips on how to accurately calibrate your studio subwoofers:
- Start by positioning your studio subwoofers correctly in your listening environment. Make sure they are placed symmetrically in the room and away from walls or corners to prevent any unwanted bass reflections.
- Use a calibration tool or audio measurement software to measure the frequency response of your subwoofers in your listening environment. This will help you identify any peaks or dips in the frequency response that need to be addressed.
- Adjust the crossover frequency of your subwoofers to seamlessly integrate with your main speakers. The crossover frequency is the point at which the subwoofer takes over from the main speakers, and it should be set based on the capabilities of your speakers and the size of your room.
- Use a reference track or audio material with a known and consistent bass response to calibrate your subwoofers. Play the track at a moderate volume and adjust the level of the subwoofers until the bass sounds balanced and full but not overwhelming.
- Pay attention to the quality of bass reproduction, not just the quantity. Make sure that the bass sounds tight, controlled, and defined without any muddiness or boominess.
- Take breaks and listen to your mix at different volume levels to ensure that the bass levels remain consistent and balanced across different listening levels.
- Trust your ears and use your judgment to make final adjustments to the bass levels in your mix. It may take some trial and error, but with careful calibration, you can achieve accurate and balanced bass levels in your studio mix.