
Best Tools for 3D Plotting in Matplotlib to Buy in July 2026
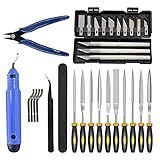
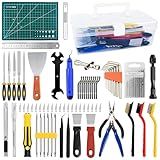
32 Piece 3D Print Tool Kit Includes Debur Tool, Cleaning, Finishing and Printing Tool,3D Print Accessories for Cleaning, Finishing and Printing 3D Prints
- ALL-IN-ONE 32-PIECE TOOLKIT FOR ALL YOUR 3D PRINTING NEEDS!
- CONVENIENT STORAGE KEEPS TOOLS ORGANIZED FOR EASY ACCESS.
- QUICK CUSTOMER SUPPORT WITHIN 12 HOURS FOR ANY QUERIES!


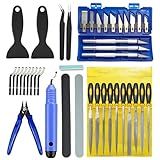
Sovol 3D Printer Tools Kit, 36 PCS 3D Printer Accessories with Deburring Tool, Digital Caliper, Art Knife Set, Removal Tools, Cutters, Pliers and Tools Storage Bag for Smoothing, Finishing, Craving
- COMPREHENSIVE KIT: INCLUDES 36 ESSENTIAL TOOLS FOR PERFECT PRINTS.
- EFFORTLESS POST-PROCESSING: ACHIEVE PRECISION WITH DURABLE, ACCURATE TOOLS.
- ORGANIZED STORAGE: KEEP YOUR WORKSPACE TIDY WITH INCLUDED STORAGE BAG.
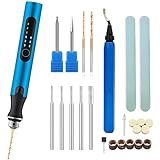
3D Printing Tools Kit,3D Printer Accessories, 3-Speed USB Rotary Tool with Bits & Deburring Tool for 3D Printing Burr, 3D Printer Model,Resin Model Engraving, Drilling, Carving, Polishing
- COMPLETE 3D PRINTING KIT: EVERYTHING NEEDED FOR PERFECT MODEL FINISHING.
- DURABLE ALUMINUM DEBURRING TOOL: BUILT TO LAST, EFFORTLESSLY REMOVES BURRS.
- VERSATILE ROTARY PEN: THREE SPEEDS FOR PRECISION WORK ON ANY MATERIAL.

3D Printing 3D Print Clean-Up Utility Tool Kit– 3 Piece Precision Print Clean-Up Tool Set – Double Ended Support Removal Accessories for 3D Prints
-
EASY CLEANUP: EFFORTLESSLY REMOVE SUPPORT MATERIAL WITH OUR TOOLS!
-
3-PIECE KIT: DOUBLE-ENDED TOOLS OFFER 6 FUNCTIONALITIES IN ONE SET.
-
DURABLE DESIGN: HIGH-QUALITY STAINLESS STEEL AND POLISHED HANDLES FOR COMFORT.
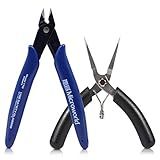
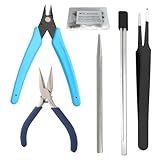
Microworld 3D Metal Model Tools, 2Pcs/Set Mini Flat Nose Plier Nipper Tool with Comfort Grip Handle, Professional for DIY 3D Metal Puzzle Model Kit Jigsaw Assembling
-
OFFICIAL MICROWORLD TOOL-EXPERT-QUALITY FOR PRECISE 3D METAL PUZZLES.
-
DURABLE CARBON STEEL PLIERS FOR QUICK, EFFICIENT METAL SHEET CUTTING.
-
30-DAY MONEY-BACK GUARANTEE PLUS 1-YEAR WARRANTY FOR PEACE OF MIND.
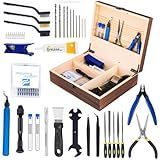
3D Printing Tool Set with Wood Box – 3D Printer Tools Features a deburring Tool, Wire Cutter, Drill, and Scraper for Model cleanup, Surface Smoothing, and Precise Drilling.
-
ORGANIZED STORAGE: STURDY WOOD CASE WITH MOVABLE COMPARTMENTS KEEPS TOOLS HANDY.
-
COMPLETE TOOL SET: ALL ESSENTIALS FOR CLEANING AND PERFECTING 3D PRINTS INCLUDED.
-
EXPERT-APPROVED: HIGH-QUALITY, DURABLE TOOLS ENSURE PRECISION FOR FLAWLESS FINISHES.
99 PCS 3D Printing Tool Kit, 3D Printer Accessories with Cleaning Needles, Carving Knives, Files, Pliers, Tweezers, Wrench Set, Brush, Cutting Mat, for 3D Print Removing, Cleaning, Finishing
- COMPREHENSIVE 99-PIECE KIT MEETS ALL YOUR 3D PRINTING NEEDS.
- DURABLE, ERGONOMIC TOOLS DESIGNED FOR EFFICIENCY AND COMFORT.
- PORTABLE STORAGE FOR EASY ACCESS-PERFECT FOR HOME OR ON-THE-GO!
Metal DIY Model Kit Tools,3D Metal Puzzle Tool Set for Adults,Including Plier Bending Assist Tab Edge Cylinder Cone Shape Bending Assist Tools, Metallic Tweezers
- DURABLE STAINLESS STEEL TOOLS ENSURE LONG-LASTING, RELIABLE USE.
- COMPLETE TOOLKIT FOR EFFORTLESS ASSEMBLY OF INTRICATE METAL PUZZLES.
- IDEAL GIFT FOR DIY ENTHUSIASTS, MAXIMIZING CREATIVITY AND FUN!
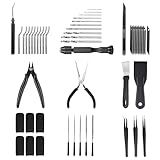
Anyman 42pcs 3D Printer Tool Kit, 3D Printing Accessories with Deburring Tool Diamond Files Pliers Carving Set and Scraper for 3D Print Removal, Smoothing, Finishing, and Model Building
- VERSATILE KIT FOR ALL POST-PROCESSING STEPS-BURRS TO POLISHING.
- WORKS WITH VARIOUS MATERIALS-PERFECT FOR 3D PRINTING ENTHUSIASTS.
- INSPIRES CREATIVITY AND COLLABORATION FOR FUN DIY PROJECTS TOGETHER.
3D Printer Tools Kit Essential, 3D Printing Tools Kit, 3D Printer Accessories with 50Pcs (Deburring Tool, Wire Cutter, Drill, Scraper..) for Remove, Smoothing, Finishing, Deburring, Craving, Drilling
- ACHIEVE FLAWLESS FINISHES WITH SPECIALIZED TOOLS FOR SMOOTH PRINTS.
- COMPREHENSIVE 50-TOOL KIT FOR ALL YOUR 3D POST-PROCESSING NEEDS.
- DURABLE, HIGH-QUALITY TOOLS ENSURE LONG-LASTING PERFORMANCE AND RELIABILITY.
To create a 3D plot in Matplotlib, you can follow these steps:
- Import the necessary libraries:
import matplotlib.pyplot as plt from mpl_toolkits.mplot3d import Axes3D
- Create a figure and an axis:
fig = plt.figure() ax = fig.add_subplot(111, projection='3d')
- Define your data points for the x, y, and z axes:
x = [1, 2, 3, 4, 5] y = [6, 7, 8, 9, 10] z = [11, 12, 13, 14, 15]
- Plot the 3D data points:
ax.scatter(x, y, z, c='r', marker='o')
- Set labels for the x, y, and z axes:
ax.set_xlabel('X') ax.set_ylabel('Y') ax.set_zlabel('Z')
- Set the title for the plot:
ax.set_title('3D Scatter Plot')
- Show the plot:
plt.show()
This will create a 3D scatter plot with your data points, where each point is represented as a marker in the 3D space defined by the x, y, and z axes.
How to change the marker style in a Matplotlib plot?
To change the marker style in a Matplotlib plot, you can use the marker parameter when calling the plot() function. This parameter allows you to specify the marker style using a string code.
Here is an example:
import matplotlib.pyplot as plt
Sample data
x = [1, 2, 3, 4, 5] y = [2, 4, 6, 8, 10]
Creating a line plot
plt.plot(x, y, marker='o')
Customizing the plot
plt.xlabel('X') plt.ylabel('Y') plt.title('Marker Style')
Displaying the plot
plt.show()
In the above example, the marker='o' parameter sets the marker style to a circle shape. You can use other string codes to change the marker style to a different shape. Some commonly used marker styles include:
- o - circle
- s - square
- D - diamond
- * - star
- . - point
You can find more marker styles in the Matplotlib documentation.
How to plot a surface plot in Matplotlib?
To plot a 3D surface plot in Matplotlib, you can use the plot_surface() function from the Axes3D module. This function takes three arguments - the X, Y, and Z coordinates of the points to be plotted on the surface.
Below is an example code to plot a surface plot in Matplotlib:
import numpy as np import matplotlib.pyplot as plt from mpl_toolkits.mplot3d import Axes3D
Generate some sample data for the surface plot
x = np.linspace(-5, 5, 100) y = np.linspace(-5, 5, 100) X, Y = np.meshgrid(x, y) Z = np.sin(np.sqrt(X**2 + Y**2))
Create a figure and a set of subplots
fig = plt.figure() ax = fig.add_subplot(111, projection='3d')
Plot the surface plot
ax.plot_surface(X, Y, Z, cmap='viridis')
Set labels and title
ax.set_xlabel('X') ax.set_ylabel('Y') ax.set_zlabel('Z') ax.set_title('Surface Plot')
Show the plot
plt.show()
In this example, the X and Y coordinates are created using np.meshgrid() and the Z coordinates are calculated using a mathematical function. The surface plot is created using the plot_surface() function on the ax object.
You can customize the surface plot by changing the color map (cmap), adding a color bar, changing the viewing angle, etc.
How to customize the line style in a Matplotlib plot?
To customize the line style in a Matplotlib plot, you can use the linestyle parameter in the plot() function. There are different line styles available, such as solid, dashed, dotted, or a combination of those.
Here's an example of how to customize the line style in a Matplotlib plot:
import matplotlib.pyplot as plt
Sample data
x = [1, 2, 3, 4, 5] y = [2, 4, 6, 8, 10]
Create a plot
plt.plot(x, y, linestyle='--') # Using dashed line style
Customize the line style
plt.plot(x, y, linestyle='-.', linewidth=2) # Using dash-dot line style with linewidth 2
Show the plot
plt.show()
In this example, the first plot() function call uses a dashed line style (linestyle='--'), and the second plot() function call uses a dash-dot line style (linestyle='-') and a linewidth of 2 (linewidth=2).
You can experiment with different line styles and linewidth values to achieve your desired customization.
How to create a stacked bar plot using Matplotlib?
To create a stacked bar plot using Matplotlib, you can follow these steps:
- Import the necessary libraries:
import matplotlib.pyplot as plt import numpy as np
- Define the data for the bar plot. Create an array or list for each category of data you want to plot, and combine them into a 2D array using the np.vstack function:
data1 = np.array([1, 2, 3, 4, 5]) data2 = np.array([2, 3, 4, 5, 6]) data3 = np.array([3, 4, 5, 6, 7])
data = np.vstack([data1, data2, data3])
- Create the figure and axes objects:
fig, ax = plt.subplots()
- Use the ax.bar function to create the stacked bar plot. Specify the positions, widths, and heights of the bars:
ax.bar(range(len(data[0])), data[0], label='Data 1') ax.bar(range(len(data[0])), data[1], bottom=data[0], label='Data 2') ax.bar(range(len(data[0])), data[2], bottom=data[0]+data[1], label='Data 3')
- Set the labels, title, and legend of the plot:
ax.set_xlabel('X-axis') ax.set_ylabel('Y-axis') ax.set_title('Stacked Bar Plot') ax.legend()
- Finally, show the plot:
plt.show()
Putting it all together, the complete code for creating a stacked bar plot using Matplotlib would look like this:
import matplotlib.pyplot as plt import numpy as np
data1 = np.array([1, 2, 3, 4, 5]) data2 = np.array([2, 3, 4, 5, 6]) data3 = np.array([3, 4, 5, 6, 7])
data = np.vstack([data1, data2, data3])
fig, ax = plt.subplots() ax.bar(range(len(data[0])), data[0], label='Data 1') ax.bar(range(len(data[0])), data[1], bottom=data[0], label='Data 2') ax.bar(range(len(data[0])), data[2], bottom=data[0]+data[1], label='Data 3')
ax.set_xlabel('X-axis') ax.set_ylabel('Y-axis') ax.set_title('Stacked Bar Plot') ax.legend()
plt.show()
This code will create a stacked bar plot with three categories of data. Each category will be represented by a different color, and the bars will be stacked one above the other.
How to create subplots in Matplotlib?
To create subplots in Matplotlib, you can make use of the subplot() function. Here's a step-by-step approach:
- Import the necessary libraries:
import matplotlib.pyplot as plt
- Define the number and arrangement of subplots. This can be done using the subplot() function, which takes three arguments: the total number of rows, the total number of columns, and the index of the current subplot.
plt.subplot(rows, columns, index)
For example, to create a grid of 2 rows and 2 columns with a specific index:
plt.subplot(2, 2, 1) # 1st plot plt.subplot(2, 2, 2) # 2nd plot plt.subplot(2, 2, 3) # 3rd plot plt.subplot(2, 2, 4) # 4th plot
- Plot the data in each subplot using regular Matplotlib plotting functions like plot(), bar(), scatter(), etc.
plt.subplot(2, 2, 1) plt.plot(x1, y1) plt.title('Subplot 1')
plt.subplot(2, 2, 2) plt.scatter(x2, y2) plt.title('Subplot 2')
...
- Add any necessary global adjustments like figure titles or labels.
plt.suptitle('Main Title')
plt.subplot(2, 2, 1) plt.ylabel('Y-axis')
...
- Finally, display the plot using plt.show().
plt.show()
By following these steps, you can create multiple subplots within a single Matplotlib figure.
How to plot 3D contours in Matplotlib?
To plot 3D contours in Matplotlib, you can use the contour function from the Axes3D module. Here's a step-by-step guide:
- Import the necessary modules:
import numpy as np import matplotlib.pyplot as plt from mpl_toolkits.mplot3d import Axes3D
- Create a figure and an axes object:
fig = plt.figure() ax = fig.add_subplot(111, projection='3d')
- Define the x, y, and z values for your data:
x = np.linspace(-5, 5, 100) y = np.linspace(-5, 5, 100) X, Y = np.meshgrid(x, y) Z = np.sin(np.sqrt(X**2 + Y**2))
- Plot the 3D contour plot using the contour function:
ax.contour3D(X, Y, Z, cmap='viridis')
- Customize the plot if needed:
ax.set_xlabel('X') ax.set_ylabel('Y') ax.set_zlabel('Z') ax.set_title('3D Contour Plot')
- Show the plot:
plt.show()
Putting it all together, here's an example that shows how to plot a 3D contour plot for a function z = sin(sqrt(x^2 + y^2)):
import numpy as np import matplotlib.pyplot as plt from mpl_toolkits.mplot3d import Axes3D
fig = plt.figure() ax = fig.add_subplot(111, projection='3d')
x = np.linspace(-5, 5, 100) y = np.linspace(-5, 5, 100) X, Y = np.meshgrid(x, y) Z = np.sin(np.sqrt(X**2 + Y**2))
ax.contour3D(X, Y, Z, cmap='viridis')
ax.set_xlabel('X') ax.set_ylabel('Y') ax.set_zlabel('Z') ax.set_title('3D Contour Plot')
plt.show()
This will generate a 3D plot of the function with contours representing the height of the function in the z-axis.