Best Wireless Printers for Easy Setup to Buy in July 2026
HP DeskJet 2827e Wireless All-in-One Color Inkjet Printer, Scanner, Copier, Best-for-Home, 3 Month Instant Ink Trial Included, AI-Enabled (6W7F5A)
- PRINT, SCAN, AND COPY WITH EASE-PERFECT FOR HOME NEEDS!
- WIRELESS PRINTING AND HP APP FOR SEAMLESS MOBILE CONTROL.
- ENJOY 3 MONTHS OF INSTANT INK FOR HASSLE-FREE PRINTING!


Canon MegaTank G3270 All-in-One Wireless Inkjet Printer. for Home Use, Print, Scan and Copy
- UP TO 2 YEARS OF INK INCLUDED-NO MORE UNEXPECTED COSTS!
- PRINT 6,000 B&W OR 7,700 COLOR PAGES WITH ONE INK SET!
- SAVE $1,000 ON INK PURCHASES-MAXIMIZE YOUR SAVINGS!

EXPLUX A4 UV Printer,with XP600 printhead Doubles The Speed of L805,Features Vacuum Platform, White Ink,one-Touch Cleaning,and high-res Flatbed Printing,Perfect for Phone Cases, Bottles, Wood, etc.
-
TWO-YEAR INK SUPPLY INCLUDED: ENJOY HASSLE-FREE PRINTING FOR 24 MONTHS!
-
STUNNING 6-COLOR PRECISION: ACHIEVE TRUE-TO-LIFE COLORS AT HIGH RESOLUTIONS!
-
GUARANTEED ACCURACY WITH VACUUM BED: FLAWLESS PRINTS ON ANY MATERIAL, EVERY TIME!

HP Envy Inspire 7255e Wireless Color Inkjet Printer, Print, scan, copy, Easy setup, Mobile printing, Best-for-home, 3 month Instant Ink trial included, AI-enabled (1W2Y9A)
-
VIBRANT BORDERLESS PHOTOS AND FAST PRINT SPEEDS (10 PPM COLOR).
-
EASY WIRELESS SETUP AND CUSTOMIZABLE TOUCHSCREEN FOR CONVENIENCE.
-
3 MONTHS OF INSTANT INK DELIVERY-NEVER RUN OUT OF INK AGAIN!
HP OfficeJet Pro 8125e Wireless All-in-One Color Inkjet Printer, Print, scan, Copy, ADF, Duplex Printing Best-for-Home Office, 3 Month Instant Ink Trial Included, AI-Enabled (405T6A)
- PRINT PRO QUALITY FAST: 10 PPM COLOR, 20 PPM BLACK FOR QUICK RESULTS.
- SMART AI PRECISION: PERFECTLY FORMATTED PRINTS WITHOUT WASTED PAGES.
- EASY REMOTE ACCESS: PRINT FROM ANY DEVICE USING THE HP APP.
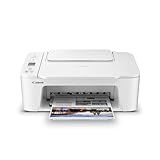
Canon PIXMA TS3720 Wireless All-in-One Printer for Basic Home Printing, White
-
ALL-IN-ONE FUNCTIONALITY: PRINT, COPY, AND SCAN WITH EASE-NO LIMITS!
-
FAST PRINT SPEEDS: GET 7.7 BLACK/4 COLOR PAGES PER MINUTE EFFORTLESSLY.
-
EASY MOBILE PRINTING: PRINT DIRECTLY FROM YOUR PHONE WITH CANON PRINT!
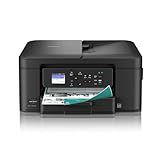
Brother Work Smart 1360 Wireless Color Inkjet All-in-One Printer with Automatic Duplex Printing and 1.8” Color Display | Includes Refresh Subscription Trial(1) (MFC-J1360DW) (Uses LC501 Series Inks)
- ALL-IN-ONE PRINTER: PRINT, COPY, SCAN-PERFECT FOR HOME OFFICES!
- EASY CLOUD APP CONNECTIONS: PRINT & SCAN FROM GOOGLE DRIVE, DROPBOX!
- FAST PRINTING: UP TO 16 PPM IN BLACK, AUTOMATIC DUPLEX INCLUDED!
Canon PIXMA TS4320 Wireless Color Inkjet Printer for Duplex Printing, White – Cost Efficient Home Printer with Copier/Scanner, Compact Design, Easy Setup, 1 Year Limited Warranty
-
AFFORDABLE ALL-IN-ONE PRINTER FOR HOME AND HYBRID WORKSPACES.
-
CRISP, VIBRANT PRINTS WITH SHARP TEXT AND VIVID COLORS EVERY TIME.
-
EFFORTLESS MOBILE PRINTING AND RELIABLE DUAL-BAND WI-FI CONNECTIVITY.
To install a wireless printer on a network without a USB cable, you can follow these steps:
- Check printer compatibility: Ensure that your printer supports wireless connectivity. Most modern printers come with built-in Wi-Fi capabilities, but it's essential to verify this feature.
- Connect the printer to power: Plug in your printer to a power source and turn it on. Ensure that it's in range of your Wi-Fi network.
- Access the printer's settings: On your printer's control panel, locate the menu or settings button. Press it to access the printer's settings.
- Connect to Wi-Fi: Look for the Wireless Setup Wizard or Wi-Fi Setup option in the printer settings. Select it and choose your Wi-Fi network from the available list. Enter the network password if prompted.
- Obtain the printer's IP address: While in the printer settings, you can usually locate the printer's IP address. Note it down as you'll need it during the installation.
- Find your computer's IP address: On your computer, go to the Start menu and search for "cmd." Open the Command Prompt application that appears. Type "ipconfig" and hit Enter. Locate the "IPv4 Address" field, which displays your computer's IP address. Note it down.
- Add a network printer on your computer: Open the Control Panel on your computer and navigate to the Devices and Printers section. Click on "Add a printer" or "Add a device" option.
- Choose network printer: When prompted, select the option to add a network printer. Your computer will now search for available printers on the network.
- Manually enter IP address: On the next screen, choose the option to add a printer using the IP address. Enter the IP address you noted down in Step 5.
- Install printer drivers: Your computer may prompt you to install necessary drivers for the printer. Follow the on-screen instructions to complete the installation. If you don't have the drivers, you can usually download them from the printer manufacturer's website.
- Test the printer: Once the installation is complete, you can try printing a test page to verify that the printer is functioning correctly.
By following these steps, you should be able to successfully install a wireless printer on your network without a USB cable.
How to check the printer's wireless signal strength during installation?
To check the printer's wireless signal strength during installation, follow these steps:
- Make sure the printer is turned on and connected to your Wi-Fi network.
- Access the printer's control panel or settings menu. This can usually be done using the touch screen or physical buttons on the printer.
- Navigate to the wireless or network settings. The exact location of these settings may vary depending on the printer model.
- Look for an option to view or check the wireless signal strength. This could be labeled as "Wireless Signal" or "Wi-Fi Strength." Select it.
- The printer will display the current wireless signal strength. This is usually represented by bars or a percentage. A strong signal will have more bars or a higher percentage, while a weak signal will have fewer bars or a lower percentage.
- Take note of the signal strength and ensure it is strong enough to maintain a stable connection. If the signal is weak, consider moving the printer closer to the Wi-Fi router or using a Wi-Fi range extender to improve the signal strength.
What is the role of encryption in securing a wireless printer on a network?
The role of encryption in securing a wireless printer on a network is to protect the information that is being transmitted between the printer and the computer or other devices connected to the network. Encryption ensures that the data is encrypted or encoded in a way that only authorized users can decrypt and understand it.
Without encryption, the data transmitted between the printer and devices can be intercepted and accessed by unauthorized individuals. This can lead to security breaches, data theft, or unauthorized access to sensitive information.
By enabling encryption on a wireless printer, the data is encrypted using a secure algorithm and can only be decrypted by the authorized devices that have the necessary encryption keys. This ensures that even if someone intercepts the data, they won't be able to understand or modify it without the encryption key.
Encryption protocols commonly used for securing wireless printers include Wi-Fi Protected Access (WPA) and its newer versions, WPA2 and WPA3. These protocols provide stronger encryption and security measures to protect the wireless communication between the printer and the network-connected devices.
Enabling encryption on a wireless printer is an important step in securing the printer and the data it handles. It helps prevent unauthorized access and ensures the confidentiality and integrity of the information being transmitted.
How to troubleshoot connectivity issues when installing a wireless printer on a network?
- Check the Wi-Fi signal: Make sure that your wireless printer is within range of your Wi-Fi network. Weak or intermittent signals can cause connectivity issues. Move the printer closer to the router or consider using a Wi-Fi extender to improve signal strength.
- Check the printer's Wi-Fi settings: Ensure that the printer's Wi-Fi settings are correctly configured. Double-check the network name (SSID) and password you entered. Additionally, ensure that the printer's wireless settings are enabled and not set to "Offline" mode.
- Restart devices: Turn off the printer, router, and any devices (computers, smartphones, etc.) connected to the network. After a few seconds, power them back on. This can refresh the network connection and resolve temporary glitches.
- Update firmware and drivers: Check the manufacturer's website for any firmware or driver updates for your printer model. Updating to the latest software can improve compatibility and resolve connectivity issues.
- Disable firewall or security software temporarily: Sometimes, firewall or security software can block the printer's connection. Temporarily disable them to see if it resolves the issue. If it does, add an exception or configure the software to allow printer connections.
- Use the printer's troubleshooting tools: Most printers have built-in troubleshooting tools accessible through their control panel or settings. Run through these tools to diagnose and resolve any connectivity issues.
- Check IP address settings: Verify that the printer is obtaining an IP address automatically from the router (using DHCP). If it has a manual IP address assigned, ensure that it matches the network's IP range and is not conflicting with other devices.
- Reset network settings: If all else fails, you may need to reset the printer's network settings to default. Refer to the printer's manual for instructions on how to perform a network reset. Afterward, reconfigure it to connect to your Wi-Fi network.
- Contact manufacturer support: If you have tried the above steps and are still unable to resolve the connectivity issue, reach out to the manufacturer's support for further assistance. They may provide specific troubleshooting steps or suggest potential hardware or software issues.
How to connect a wireless printer to a network?
Connecting a wireless printer to a network typically involves the following steps:
- Ensure that your wireless printer is properly installed and powered on.
- Make sure that your computer or mobile device is also connected to the same Wi-Fi network that you want to connect the printer to.
- Locate the Wi-Fi settings on your printer. This can usually be found in the printer's control panel or settings menu.
- Access the network settings on your printer and select the option to connect to a wireless network. This might be labeled as "Wi-Fi Setup" or "Network Setup."
- Look for the available Wi-Fi networks and select the one you want your printer to connect to.
- If prompted, enter the Wi-Fi network password to complete the connection. The password is usually case sensitive, so ensure that you enter it correctly.
- Once successfully connected to the Wi-Fi network, you should see the wireless indicator light on the printer display or control panel.
- Test the connection by printing a test page or document from your computer or mobile device. Make sure that the printer is selected as the default printer in your device's printing settings.
Note: The exact steps may vary slightly depending on the printer model and the device you are using. It is recommended to refer to the printer's user manual for specific instructions or visit the manufacturer's support website for further assistance.
What is the role of a wireless router in connecting a printer to a network?
The role of a wireless router in connecting a printer to a network is to facilitate communication between the printer and other devices on the network. The wireless router serves as a central hub that allows multiple devices, including printers, to connect and communicate with each other.
When a printer is connected to a wireless router, it can receive print jobs from devices such as computers, laptops, smartphones, or tablets that are also connected to the same network. The router assigns the printer an IP address, which enables the devices to locate and send print commands to the printer.
Additionally, the router manages the wireless network by providing a secure connection between the printer and other devices, ensuring data privacy and preventing unauthorized access. It also allows the printer to access the internet for firmware updates or cloud-based printing services.
Overall, the wireless router acts as the intermediary that enables seamless connectivity and communication between the printer and other networked devices.
What is the role of SSID in connecting a wireless printer to a network?
The SSID (Service Set Identifier) is essentially the name of the wireless network. When connecting a wireless printer to a network, the printer scans for available networks in the vicinity and displays a list of SSIDs. The user needs to select the appropriate SSID of the network they want to connect the printer to. By providing the SSID, the printer is able to identify and establish a connection with the correct network. This allows the printer to communicate with other devices on the network and perform printing tasks wirelessly.