
Best Code Analysis Tools to Buy in July 2026
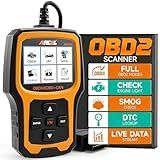
ANCEL AD410 Enhanced OBD2 Scanner, Vehicle Code Reader for Check Engine Light, Automotive OBD II Scanner Fault Diagnosis, OBDII Scan Tool for All OBDII Cars 1996+, Black/Yellow
- WIDE COMPATIBILITY: WORKS WITH ALL OBDII CARS, TRUSTED BY SCOTTY KILMER!
- QUICK FAULT CODES: READ/CLEAR EMISSIONS CODES EFFORTLESSLY WITH 42,000+ LOOKUPS.
- USER-FRIENDLY DESIGN: CLEAR 2.4 DISPLAY & INTUITIVE UI FOR ALL SKILL LEVELS.


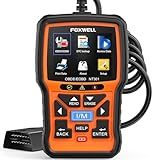
FOXWELL NT301 OBD2 Scanner Live Data Professional Mechanic OBDII Diagnostic Code Reader Tool for Check Engine Light
-
PLUG & PLAY DESIGN: EASY TO USE, NO UPDATES NEEDED-JUST CONNECT AND GO!
-
LIVE DATA GRAPHING: MONITOR VEHICLE PERFORMANCE WITH REAL-TIME DATA INSIGHTS.
-
EXPERT RECOMMENDED: TRUSTED BY PROFESSIONAL MECHANICS FOR ACCURATE DIAGNOSTICS.
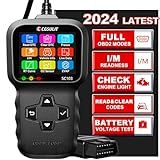
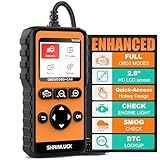
OBD2 Scanner, CGSULIT SC103 Car Code Reader Diagnose Check Engine Light Smog Check DTCs Scan Tool Live Data Stream Voltage Test for Vehicles Since 1996
-
EASY CODE READING & CLEARING: EFFORTLESSLY MANAGE CHECK ENGINE ALERTS.
-
WIDE VEHICLE COMPATIBILITY: SUPPORTS ALL OBDII PROTOCOLS FOR DIVERSE MODELS.
-
USER-FRIENDLY DESIGN: COMPACT, VIBRANT SCREEN FOR QUICK DIAGNOSTICS ANYTIME.
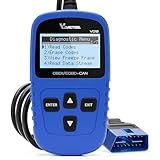
VDIAGTOOL VD10 OBD2 Scanner Code Reader Car Diagnostic Tool Engine Fault Code Reader for Turn Off CEL with Freeze Frame/I/M Readiness for All OBDII Protocol Cars, OBD2 Scanner Diagnostic Tool
- PLUG & PLAY DESIGN: EASY SETUP; SIMPLY CONNECT TO YOUR OBDII PORT!
- INSTANT CODE READ & CLEAR: DIAGNOSE ISSUES FAST; GET INSTANT SOLUTIONS!
- EXTENSIVE COMPATIBILITY: WORKS WITH 99% OF VEHICLES GLOBALLY FOR RELIABILITY!

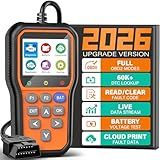
ANCEL BD310 OBD2 Scanner & Engine Code Reader - Advanced Battery Test, Trip Analysis, Performance Test, Bluetooth Diagnostic Tool for Android & iPhone - Works for All 1996+ Vehicles
- FAST, RELIABLE SCANNING: BLUETOOTH & WIRED FOR INSTANT RESULTS!
- CLEAR ENGINE CODES: UNDERSTAND AND FIX ISSUES CONFIDENTLY WITH EASE!
- COMPREHENSIVE DIAGNOSTICS: ALL 10 OBDII MODES FOR DETAILED INSIGHTS!
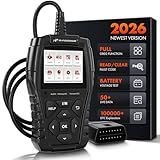
BluSon YM319 OBD2 Scanner Diagnostic Tool with Battery Tester, Check Engine Fault Code Reader with Live Data, Cloud Printing, DTC Lookup, Freeze Frame, Scan Tool for All OBDII Protocol Cars Since 1996
-
SWIFT CODE READING & CLEARING: DIAGNOSE ENGINE ISSUES IN SECONDS!
-
ONE-CLICK BATTERY HEALTH CHECK: PREVENT FAILURES WITH INSTANT BATTERY DIAGNOSTICS.
-
LIVE DATA & CLOUD REPORTS: ACCESS AND SHARE DETAILED VEHICLE DIAGNOSTICS EASILY!
Y2 2.8'' Color Graphing Screen OBD2 Scanner Diagnostic Tool,Enhanced PRO Check and Reset Engine Fault Code,DTC Lookup,O2 Sensor Test,Live Data,Freeze Frame,OBDII Code Reader Tool for All Cars
-
USER-FRIENDLY DESIGN ENSURES QUICK FAULT DIAGNOSIS AND REPAIR SAVINGS.
-
ADVANCED FUNCTIONS LIKE FREEZE FRAME AND O₂ TESTING FOR PRECISE ANALYSIS.
-
WIDE VEHICLE COMPATIBILITY AND PORTABLE DESIGN FOR EASY DIAGNOSTICS ANYTIME.
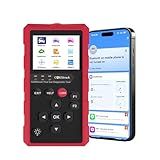
CARXtruck Wireless obd2 Scanner Diagnostic Tool,Bluetooth OBD2 Scanner for Android & iPhone,Check Engine Code Reader with Live Data, I/M Readiness & Fault Code Reset, for All Vehicles from 1996
- INSTANT DIAGNOSTICS: READ & CLEAR 96,000 DTCS FOR QUICK REPAIRS.
- WIRELESS CONVENIENCE: ENJOY HASSLE-FREE, CABLE-FREE VEHICLE CHECKS.
- USER-FRIENDLY APP: ACCESS REPORTS & EXPERT ADVICE ON THE GO.
A-Premium AD200 Professional OBD2 Scanner Car Diagnostic Tool, OBDII EOBD Code Reader, Enhanced Check Car Engine Light Diagnostic Scan Tool, Upgraded Fault Code Scanner for All Vehicles from 1996
- POWERFUL FEATURES: 15+ FUNCTIONS FOR EFFICIENT VEHICLE DIAGNOSTICS.
- DETAILED DATA INSIGHTS: VIEW REAL-TIME DATA WITH VISUAL CURVES.
- USER-FRIENDLY DESIGN: BIGGER SCREEN AND HOTKEYS FOR EASY OPERATION.
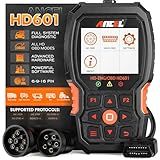
ANCEL Heavy Duty Truck Scanner HD601 All System Diesel Diagnostic Scan Tool fits for Cummins, Detroit, Freightliner, International, Paccar, Check Engine for Truck & Car 2 in 1 Code Reader
-
BROAD COMPATIBILITY: WORKS WITH 12V & 24V TRUCKS, MAJOR MODELS INCLUDED.
-
ALL-SYSTEM DIAGNOSTICS: SUPPORTS FULL SCANS FOR ENGINES, ABS, AND MORE.
-
USER-FRIENDLY DESIGN: PLUG-AND-PLAY WITH A 2.8 LCD FOR EASY NAVIGATION.
Performing code analysis with SonarQube in a CI/CD pipeline helps identify and address potential code issues and vulnerabilities early in the software development process. SonarQube is an open-source platform that offers comprehensive code quality checks, providing valuable insights into code quality, security, reliability, and maintainability.
To integrate SonarQube into a CI/CD pipeline, follow these steps:
- Configure SonarQube server: Install and set up a SonarQube server either locally or on a cloud-based platform. Configure it to suit your requirements, including defining coding rules, quality profiles, and security concerns.
- Install SonarQube scanner: Install the SonarQube scanner on the machine that executes the CI/CD pipeline. This scanner is responsible for analyzing the code and sending the results to the SonarQube server.
- Configure the build pipeline: Add a new step in your CI/CD pipeline configuration file to execute the SonarQube scanner. This step should be placed after the code compilation and before any deployment or release steps.
- Execute SonarQube scanner: In this step, run the SonarQube scanner and provide the necessary configuration settings such as the server URL and project key. The scanner will analyze the code using predefined rules and generate a report based on the code quality metrics.
- Publish SonarQube analysis result: After the analysis is complete, publish the analysis report to the SonarQube server. This allows you to review and track the code quality trends over time.
- Set quality gates: Define quality gates in SonarQube to enforce quality standards. Quality gates are predefined conditions based on various metrics, such as code coverage, code duplication, security vulnerabilities, and technical debt. If the code fails to meet these conditions, the build pipeline will be marked as failed.
- Monitor and act on the results: Regularly monitor the results and alerts generated by SonarQube. Analyze the reported issues, prioritize them based on their severity, and take the necessary steps to address them. This helps ensure continuous improvement and maintenance of code quality.
By integrating SonarQube into your CI/CD pipeline, you can automate code analysis, enforce coding standards, and detect potential issues early on. This enhances the overall code quality, increases security, and reduces technical debt, leading to more reliable and maintainable software.
How to configure SonarQube rules and quality profiles for code analysis?
To configure SonarQube rules and quality profiles for code analysis, follow these steps:
- Login to your SonarQube instance as an administrator.
- Go to the "Quality Profiles" page under the "Quality Profiles" tab in the SonarQube menu.
- Select the programming language for which you want to configure the rules and quality profiles.
- Click the "Create" button to create a new quality profile or select an existing profile to modify.
- In the profile settings, you will see a list of available rules categorized by different code quality aspects such as bugs, vulnerabilities, code smells, and more.
- Enable or disable rules based on your requirements. You can click on the rule to see its description and make an informed decision.
- Set the severity level for each rule. The severity levels range from "Blocker" to "Info" indicating the impact of the violation.
- Adjust the parameters for some rules if needed. These parameters define the behavior of the rule and allow customization to match your code standards and preferences.
- Customize the quality profile by adding or removing rules as necessary.
- Save the changes to the quality profile.
You can also import/export quality profiles to share them with your team or across different SonarQube instances. Additionally, you can associate projects with your configured quality profiles to start analyzing code with the defined ruleset.
Remember to periodically review and update your quality profiles as you identify new rules or improve existing ones to enhance the code analysis process.
How to measure technical debt using SonarQube's code analysis reports?
To measure technical debt using SonarQube's code analysis reports, you can follow these steps:
- Install and configure SonarQube: Download and set up SonarQube on your server or local machine.
- Analyze code: Use SonarScanner or any other build tool to analyze your project's source code. This will generate a report with various metrics and issues.
- Generate a code analysis report: Once the code analysis is complete, SonarQube generates a comprehensive report with details about code quality, bugs, vulnerabilities, code smells, and technical debt.
- Analyze the Technical Debt section: In the SonarQube report, navigate to the Technical Debt section. This section provides an overview of the accumulated technical debt in your project.
- View Technical Debt measures: SonarQube provides several metrics to measure technical debt, such as: a. Technical Debt Ratio: This metric calculates the percentage of outstanding technical debt compared to the overall codebase. A higher ratio indicates more debt. b. Specific Technical Debt Measures: SonarQube categorizes technical debt into various types such as complexity, duplication, comment density, test coverage, etc. Analyze these measures to identify specific areas that need improvement. c. Estimated Effort to Remediate Issues: SonarQube estimates the effort required to fix the identified issues. This can help prioritize and plan remediation tasks.
- Set up quality gates: Define quality gates in SonarQube to set thresholds for technical debt. Quality gates allow you to define acceptable levels for each metric and get notified if they are breached.
- Continuously monitor and improve: Run SonarQube code analysis regularly to track changes in technical debt over time. Monitor the quality gates and continuously work on reducing technical debt.
By following these steps, you can effectively measure technical debt using SonarQube's code analysis reports and take necessary actions to improve code quality.
How to leverage SonarQube's reporting capabilities to track the code quality trend over time?
To leverage SonarQube's reporting capabilities to track the code quality trend over time, follow these steps:
- Install and configure SonarQube: Set up SonarQube on your server and configure it to analyze your codebase. Make sure you have connected the SonarQube instance with your code repository.
- Analyze your code: Run the SonarQube analysis on your codebase using either the SonarScanner or your build tool's integration with SonarQube. This will generate code quality metrics and store them in the SonarQube database.
- Configure quality gates: Define quality gates in SonarQube to set quality thresholds for your codebase. Quality gates help you define acceptable levels of code quality and analyze whether the new code meets those criteria.
- Analyze the project dashboard: Access the SonarQube project's dashboard to view the code quality metrics. It will provide an overview of the current state of the code quality, such as quality issues, test coverage, code duplications, and technical debt.
- Monitor the trend graphs: SonarQube provides trend graphs that display the evolution of code quality metrics over time. These graphs allow you to track changes in code quality and identify any potential issues or improvements. The trend graphs are available for various metrics like code smells, bugs, vulnerabilities, and test coverage.
- Set up notifications: Configure notifications in SonarQube to receive alerts when code quality deteriorates or improves beyond a certain threshold. Notifications can be sent via email or integrated directly into your team's preferred collaboration tool, such as Slack or Microsoft Teams.
- Review and act on the reports: Periodically review the SonarQube reports to track the code quality trend over time. Identify trends, patterns, and areas for improvement. If any quality issues or regressions are identified, take appropriate actions to fix them.
- Share the reports: Share the SonarQube reports with relevant stakeholders, such as project managers, developers, and QA teams. Discuss the code quality trends and work together to drive continuous improvement.
By consistently following these steps, you can effectively leverage SonarQube's reporting capabilities to track the code quality trend over time and ensure the overall health and maintainability of your codebase.
How to integrate SonarQube with code review tools like Gerrit or GitHub pull requests?
To integrate SonarQube with code review tools like Gerrit or GitHub pull requests, you can follow these steps:
- Install and configure SonarQube server: Download SonarQube from the official website and install it on a server. Configure the necessary settings, including the database connection, authentication, and project-specific settings.
- Install SonarScanner: SonarScanner is a command-line tool that analyzes code and sends the analysis results to SonarQube. Install the appropriate SonarScanner for your programming language and framework.
- Configure SonarScanner properties: Create a sonar-project.properties file in the root directory of your project. Configure the necessary properties, including the SonarQube server URL, project key, and source code location.
- Run SonarScanner: Execute the SonarScanner command for your project. This will analyze your code and send the analysis results to the SonarQube server.
- Set up webhooks or plugins: For Gerrit, configure the Sonar-Gerrit plugin so that code analysis is triggered automatically when a change is uploaded. For GitHub, set up webhooks to trigger code analysis whenever a pull request or code push event occurs.
- Configure pull request decoration: To display SonarQube analysis results in the pull request, configure the appropriate settings. For Gerrit, configure the Sonar-Gerrit plugin to update the change status with analysis details. For GitHub, use the SonarQube GitHub plugin or a custom script to comment on the pull request with the analysis results.
- Verify integration: Test the integration by making changes to your code and creating a pull request or submitting a change to Gerrit. Check if the code analysis results are displayed correctly in the respective code review tool.
By following these steps, you can integrate SonarQube with Gerrit or GitHub pull requests and streamline your code review process while ensuring code quality.