
Best Python Charting Tools to Buy in July 2026

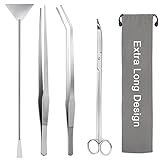
Fistoy Aquarium Aquascaping Tool, Long Tweezers Scissors Spatula, 4 in 1 Stainless Steel Aquatic Plants Set for Fish Starter Kits, Aquariums Tank and Terrarium
-
ALL-IN-ONE TOOLKIT: ENHANCE YOUR AQUASCAPING WITH PRECISION TOOLS.
-
DURABLE STAINLESS STEEL: RUST-PROOF & FLEXIBLE FOR LONG-LASTING USE.
-
SAFE FOR PLANTS: MINIMAL WATER DISTURBANCE ENSURES HEALTHIER AQUASCAPES.


Liveek Aquarium Aquascape Tools Kit 15in, 4 in 1 Anti-Rust Aquatic Plant Aquascaping Tool Stainless Steel Tweezers Scissor Spatula for Aquarium Tank Clean Fish Tank Aquascape Accessories Set(Silver)
- VERSATILE 4-IN-1 TOOLS FOR EASY AQUASCAPING & MAINTENANCE!
- DURABLE ANTI-RUST DESIGN ENSURES LONG-LASTING PERFORMANCE!
- GENTLE ON PLANTS: TRIM WITHOUT RISK OF DAMAGE!
Causal Inference in Python: Applying Causal Inference in the Tech Industry
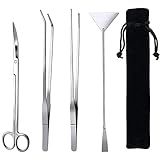
FISTOY 15in Aquascaping Tools, 4 in 1 Long Aquarium Tweezers Scissors Spatula, Stainless Steel Aquatic Plants Aquascaping Tools Set for Fish Starter Kits, Aquariums Tank and Terrarium
- COMPLETE AQUASCAPING KIT: 4 TOOLS FOR ALL YOUR FISH TANK NEEDS IN ONE SET.
- DURABLE & COMFORTABLE: STAINLESS STEEL WITH SECURE, ANTI-SLIP GRIP DESIGN.
- GENTLE ON NATURE: MINIMIZES WATER DISTURBANCE AND ENSURES PLANT SAFETY.

Python for Data Analysis: Data Wrangling with Pandas, NumPy, and IPython
To plot a 3D graph from Excel using Matplotlib, you can first export your data from Excel into a CSV file. Then, in Python, you can use Pandas to read the CSV file and extract the data. Next, you can use Matplotlib's 3D plotting capabilities to create the graph by specifying the x, y, and z coordinates based on your data.
You can use Matplotlib's Axes3D module to create a 3D plot and customize it with labels, title, and colors. Make sure to install Matplotlib and Pandas in your Python environment before running the script. Once you have your code ready, you can run it in a Python environment to generate the 3D graph from your Excel data.
What is the best way to represent trends in a 3D graph?
One effective way to represent trends in a 3D graph is by using a combination of color coding and varying the height of the bars or data points to indicate different levels or values. This can help to visualize the trends in a clear and easy-to-understand manner. Additionally, you can use trend lines or gradient shading to highlight the direction of the trend within the graph. It is also important to make sure that the axes are labeled clearly and that the graph is easy to interpret at a glance.
How to rotate a 3D graph in matplotlib for better visualization?
To rotate a 3D graph in matplotlib for better visualization, you can use the view_init method of the Axes3D object. This method allows you to set the elevation and azimuth angles to control the viewpoint of the 3D plot.
Here is an example code snippet that shows how to rotate a 3D graph in matplotlib:
import matplotlib.pyplot as plt from mpl_toolkits.mplot3d import Axes3D import numpy as np
Generate some data
x = np.linspace(-5, 5, 100) y = np.linspace(-5, 5, 100) X, Y = np.meshgrid(x, y) Z = np.sin(np.sqrt(X**2 + Y**2))
Create a 3D plot
fig = plt.figure() ax = fig.add_subplot(111, projection='3d') surf = ax.plot_surface(X, Y, Z, cmap='viridis')
Rotate the plot
ax.view_init(elev=30, azim=45)
plt.show()
In the above code, the view_init method is called on the Axes3D object ax to set the elevation angle to 30 degrees and the azimuth angle to 45 degrees. You can experiment with different values for the elevation and azimuth angles to find the viewpoint that provides the best visualization of your 3D data.
What is the function used to plot 3D graphs in matplotlib?
The function used to plot 3D graphs in matplotlib is Axes3D from the mpl_toolkits.mplot3d module. This module allows users to create and interact with 3D plots using an instance of the Axes3D class.
How to adjust the lighting in a 3D graph for better visualization?
Adjusting the lighting in a 3D graph can greatly impact the visualization and clarity of the graph. Here are some tips on how to adjust the lighting for better visualization:
- Use directional lighting: Directional lighting can help create shadows and highlights, which can make the graph easier to interpret. Experiment with positioning the light source at different angles to see what works best for your graph.
- Adjust the intensity of the light: Increasing or decreasing the intensity of the light can help improve the visibility of the graph. Make sure the graph is well-lit but not overly bright, as this can make it difficult to see the details.
- Use ambient lighting: Ambient lighting can help illuminate the entire graph evenly, making it easier to see all the data points. Experiment with different levels of ambient lighting to find the right balance for your graph.
- Experiment with different lighting effects: Many graphing software tools offer various lighting effects, such as specular highlights or reflections. These effects can add depth and dimension to the graph, making it more visually appealing and easier to interpret.
- Consider the color scheme of the graph: The lighting in a 3D graph can interact with the colors used in the graph, affecting the overall visual impact. Experiment with different color schemes and lighting settings to find the combination that works best for your data visualization.
By adjusting the lighting in a 3D graph, you can enhance the visualization and make it easier for viewers to interpret the data. Experiment with different lighting settings and effects to find the best combination for your specific graph and data.
How to plot a function in a 3D graph using matplotlib?
You can plot a function in a 3D graph using the following steps:
- Import the necessary libraries:
import numpy as np import matplotlib.pyplot as plt from mpl_toolkits.mplot3d import Axes3D
- Define the function that you want to plot:
def f(x, y): return x**2 + y**2
- Create a meshgrid of x and y values:
x = np.linspace(-5, 5, 100) y = np.linspace(-5, 5, 100) X, Y = np.meshgrid(x, y) Z = f(X, Y)
- Create a 3D plot using matplotlib:
fig = plt.figure() ax = fig.add_subplot(111, projection='3d') ax.plot_surface(X, Y, Z, cmap='viridis')
Set labels for x, y, and z axes
ax.set_xlabel('X') ax.set_ylabel('Y') ax.set_zlabel('Z')
plt.show()
This code will create a 3D plot of the function f(x, y) = x^2 + y^2 over the range -5 <= x <= 5 and -5 <= y <= 5. You can modify the function f and the range of x and y values to plot different functions.