Best Programming Tools to Buy in July 2026
VXDAS 2IN1 TPMS Relearn Tool Super GL50448 for GM and Ford with Model Switch Button,Tire Pressure Sensor Monitor Reset Activation for Buick/Cadillac/Chevrolet/GMC/Lincoln 2025 Edition(Green)
-
CONVENIENT 2-IN-1 DESIGN FOR POPULAR GM AND FORD VEHICLES.
-
EFFORTLESSLY RESET TPMS TO SAVE $50-100 ON DEALER VISITS.
-
TRUSTED BY PROFESSIONALS FOR RELIABLE TIRE PRESSURE MONITORING.


Autel MaxiTPMS TS508WF TPMS Programming Tool, 2026 Upgrade WiFi Ver. of TS508 TS501 TS408 TS601, Tire Pressure Monitor, Program MX-Sensors 315/433MHz, Relearn Activate All Sensors, TPMS Reset Diagnose
-
LIFETIME WIFI UPDATES FOR SEAMLESS PERFORMANCE IMPROVEMENTS!
-
TWO SERVICE MODES: QUICK & ADVANCED FOR EFFICIENT REPAIRS!
-
CONTACT US ANYTIME FOR EXPERT SUPPORT & COMPATIBILITY CHECKS!
Opus IVS CarDAQ-Pro All Makes J2534 Reprogramming Tool and Remote Assisted Programming Plus IVS360
- FLEXIBLE PROGRAMMING OPTIONS: USE OEM SUBSCRIPTION OR PAY-PER-USE RAP.
- EXPERT DIAGNOSTIC ASSISTANCE: ACCESS LIVE OEM TECH SUPPORT 24/7.
- COMPREHENSIVE PROTOCOLS: ALL J2534 PROTOCOLS, INCLUDING DOIP AND CANFD.
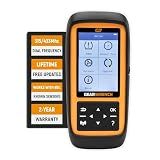
GEARWRENCH Universal Tire Pressure Monitoring System Programming & Diagnostic Tool | GWTPMS
- CLEAR TPMS WARNING LIGHTS IN SECONDS ON NEARLY ANY VEHICLE!
- COMPATIBLE WITH 315 MHZ & 433 MHZ SENSORS FOR MAXIMUM RANGE.
- PROGRAM UP TO 8 SENSORS AT ONCE-SAVE TIME AND BOOST EFFICIENCY!
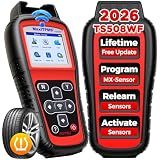
Autel MaxiTPMS TS508WF TPMS Programming Tool, 2026 WiFi Ver. of TS508 TS501 Pro TS408S, Program Autel TPMS Sensors (315/433MHz), TPMS Reset/Relearn/Activate All Sensors, TPMS Scan Tool Read/Clear DTCs
- 🚀 QUICK AND EASY TPMS PROGRAMMING FOR 99% OF GLOBAL VEHICLES!
- 🔄 ACTIVATE ALL KNOWN TPMS SENSORS WIRELESSLY IN SECONDS!
- 💻 LIFETIME FREE UPDATES ENSURE YOU STAY AHEAD WITH LATEST FEATURES!
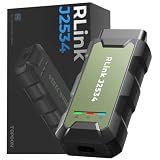
TOPDON RLink J2534 Pass-Thru Programmer, OEM Reprogramming and Diagnostic Tool, Enhanced J2534 VCI, Supports J2534/D-PDU/CAN-FD/DoIP, Compatible with 18+ Vehicle Brands, No OE Software Provided
-
BROAD VEHICLE COMPATIBILITY: SUPPORTS 18+ BRANDS FOR VERSATILE DIAGNOSTIC POWER.
-
ALL-IN-ONE SOLUTION: FULL-SYSTEM DIAGNOSTICS AND ADVANCED ECU PROGRAMMING IN ONE TOOL.
-
LIFETIME UPDATES: STAY CURRENT WITH FREE UPDATES FOR LATEST DRIVERS AND FEATURES.
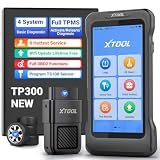
XTOOL TP300 TPMS Programming Tool, Engine ABS SRS Transmission OBD2 Scanner with Touchscreen, 8 Resets, Throttle Relearn, Activate/Relearn All TPMS Sensors, Program XTOOL TS100 Sensors (315/433MHz)
- COMPREHENSIVE DIAGNOSTICS: COVERS 5 SYSTEMS FOR EFFICIENT VEHICLE CHECKS.
- EASY TPMS SERVICES: ACTIVATE, RESET, AND PROGRAM TPMS WITH EASE.
- LIFETIME UPDATES: FREE UPDATES KEEP TOOL CURRENT WITHOUT EXTRA FEES.
To send push notification when var1 is equal to var2 in Swift, you would first need to compare the two variables using an if statement. If var1 is equal to var2, then you can use the UNUserNotificationCenter class to create and schedule a push notification. You would need to set up the notification content, request authorization from the user, and finally trigger the notification to be sent. Remember to handle any errors that may occur during the process of sending the notification.
How to check if two variables are equal in Swift?
You can check if two variables are equal in Swift using the == operator. Here's an example:
let variable1 = 10 let variable2 = 10
if variable1 == variable2 { print("The two variables are equal") } else { print("The two variables are not equal") }
In this example, the == operator is used to compare variable1 and variable2. If the two variables have the same value, the message "The two variables are equal" will be printed. Otherwise, the message "The two variables are not equal" will be printed.
What are the key components of a push notification system in Swift?
- User Permission: In Swift, the first step in implementing a push notification system is to request permission from the user to send notifications. This involves prompting the user to accept or deny permission for the app to send push notifications.
- Registering for Push Notifications: Once permission is granted, the app must register for push notifications with Apple's Push Notification Service (APNs). This involves generating a unique device token that is used to send notifications to the specific device.
- Handling Incoming Notifications: The app must implement methods to handle incoming push notifications. This includes displaying the notification message, handling any custom actions associated with the notification, and updating the app's interface based on the notification content.
- Customizing Notifications: In Swift, developers can customize the appearance and behavior of push notifications using the UserNotifications framework. This allows for the addition of custom actions, sounds, badges, and notification content.
- Handling Notification Responses: When a user interacts with a push notification, the app must handle the response appropriately. This can include opening a specific screen in the app, performing a certain action, or updating data based on the user's response.
- Remote Notifications: Remote notifications are notifications that are delivered to the user's device even when the app is not running. In Swift, developers can implement remote notifications using a combination of background modes, silent notifications, and push notification payloads.
- Testing and Debugging: Finally, before releasing the app, it is important to thoroughly test and debug the push notification system. This includes testing the app's behavior in response to different types of notifications, ensuring that notifications are delivered correctly, and handling any edge cases or errors that may occur.
What are the best practices for implementing push notifications in Swift?
- Get user permission: Before sending push notifications, you need to request permission from the user to send them. Make sure to handle both cases where the user grants and denies permission.
- Use a reliable push notification service: Use a reliable push notification service such as Firebase Cloud Messaging (FCM) or Apple Push Notification Service (APNS) to handle the sending and receiving of push notifications.
- Personalize notifications: Personalize push notifications for each user based on their behavior and preferences to increase engagement and retention rates.
- Optimize delivery times: Schedule push notifications to be delivered at times when users are most likely to be active and engage with your app.
- Use rich media: Incorporate rich media such as images, videos, and emojis in your push notifications to make them more engaging and visually appealing.
- Monitor and analyze performance: Track the performance of your push notifications by monitoring metrics such as open rates, click-through rates, and conversion rates. Use this data to optimize future campaigns.
- Test and iterate: Continuously test different variations of push notifications to determine what resonates best with your users and iterate based on the results.
- Provide an easy way to opt-out: Offer users an easy way to opt-out of receiving push notifications if they no longer wish to receive them. This will help maintain a positive user experience.