
Best React Testing Tools to Buy in July 2026
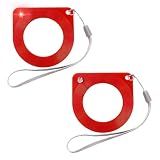
povtii 2 PCS Car Key Test Coil, Auto Key Lock Chip Induction Signal Diagnostic Test Card, Automotive Anti-Theft System Auto-Sensing Signal Quick Test Tool, Car Accessories
-
DURABLE ABS MATERIAL ENSURES LONG-LASTING PERFORMANCE AND RELIABILITY.
-
QUICK SIGNAL DETECTION WITH LED INDICATOR FOR INSTANT RESULTS.
-
COMPACT DESIGN WITH LANYARD FOR EASY PORTABILITY AND CONVENIENCE.


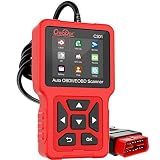
Creator C301 OBD2 Scanner OBDII Code Reader Diagnostic Scan Tool with Battery Test for All OBD-II Protocol Cars Since 1996 Check Engine Light
-
WIDE VEHICLE COVERAGE FOR MOST US, EU, AND ASIAN CARS, 1996+ MODELS.
-
ENHANCED DATASTREAM: VIEW 4 LIVE PARAMETERS FOR QUICK PROBLEM DETECTION.
-
USER-FRIENDLY DESIGN WITH FULL-COLOR SCREEN-PLUG AND PLAY SIMPLICITY!
Creating NPM Package: Your React TypeScript Guide to Create, Test, and Publish NPM Libraries

Hacking and Security: The Comprehensive Guide to Ethical Hacking, Penetration Testing, and Cybersecurity (Rheinwerk Computing)
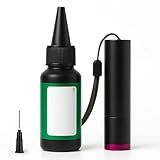
PZHZ Lead Test Kit – Fast Lead Detection for Dishes, Paint & Toys, Includes Non-Lead Reference Card & UV-Protection Gloves, 1 Bottle Test Liquid + Free Lab Tests, Accurate & Easy Home Use
- COMPLETE KIT: EVERYTHING FOR SAFE, EASY LEAD TESTING AT HOME!
- FAST RESULTS: JUST 1 DROP FOR QUICK COLOR CHANGES IN SECONDS.
- FREE LAB TESTS: PROFESSIONAL VERIFICATION INCLUDED FOR PEACE OF MIND.

Practical Portable Jewelry Test Tool Diamond Selector III with LED Indicator for Jewelry Jade Ruby Stone High Accuracy Electronic Diamond Tester Tool
- LIGHTWEIGHT & COMPACT DESIGN FOR EFFORTLESS PORTABILITY AT HOME.
- REAL DIAMONDS SHOW RED LED INDICATION FOR QUICK IDENTIFICATION.
- ACCURATE RESULTS WITH METAL ALARM FOR ADDED DETECTION SAFETY.
Unit testing React components is important to ensure that they function correctly and as expected. Here are some key steps to consider when testing React components:
- Import necessary libraries: You need to import libraries like React, ReactDOM, and any testing libraries like Jest or Enzyme.
- Render the component: Use the testing library to render your React component. This creates an instance of the component and its virtual DOM representation.
- Set up necessary dependencies: If your component relies on external dependencies such as APIs or state management libraries, you may need to set up mocks or stubs to simulate these dependencies.
- Simulate user interactions: Trigger actions or events on the component, such as clicking buttons or inputting values. You can use testing libraries to simulate these interactions.
- Verify component behavior: Assert or validate the expected behavior of the component. This can involve checking if the component correctly updates its state, renders the expected output, or triggers certain actions.
- Cleanup: Clean up any resources used during testing, such as resetting mocks or stubs, to ensure a clean state for subsequent tests.
- Repeat for different scenarios: Write additional tests to cover different scenarios or edge cases. Test both the positive and negative scenarios to ensure comprehensive coverage.
- Run the tests: Use your chosen testing framework (e.g., Jest) to run the tests and see the results. You can also automate the test execution as part of a continuous integration (CI) system.
Remember, unit tests should focus on testing the functionality of individual components in isolation, without relying on other components or external dependencies. You can use tools like Jest, Enzyme, or React Testing Library to simplify and streamline the testing process.
How to set up a unit testing environment for React components?
To set up a unit testing environment for React components, you can follow these steps:
- Install required dependencies: Install the necessary testing libraries such as Jest and React Testing Library as dev dependencies in your project. You can use npm or yarn to install them.
# Using npm npm install --save-dev jest react-testing-library
Using yarn
yarn add --dev jest react-testing-library
- Create a test file: Place your tests in a separate file with the .test.js or .spec.js suffix. For example, if your component is named Component.js, the corresponding test file should be Component.test.js.
- Write your tests: In your test file, import the necessary testing libraries and the component you want to test. Use Jest's testing functions, such as describe and it, to structure your tests, and use React Testing Library's render function to render your component and interact with it.
// Component.test.js import React from 'react'; import { render } from 'react-testing-library';
import Component from './Component';
describe('Component', () => {
it('renders correctly', () => {
const { getByText } = render(
- Configure Jest: By default, Jest will look for .test.js or .spec.js files in your project's src directory. If your test files are located elsewhere, or if you have any specific configuration needs, you can create a jest.config.js file at the root of your project and customize Jest's behavior.
// jest.config.js
module.exports = {
testMatch: ['
- Run your tests: Finally, you can run your tests using a test runner, such as Jest. You can add a test script in your project's package.json to make it easier to run your tests.
// package.json { // ... "scripts": { "test": "jest" } }
Now, you can run your tests using the command npm test or yarn test and check the test results.
This setup will provide you with a basic environment to write and run unit tests for your React components. You can add additional testing utilities, custom configurations, and assertions as needed to meet your specific testing requirements.
What is unit testing in React?
Unit testing in React is the process of testing individual units or components of a React application in isolation. It involves isolating a component from its dependencies and testing its behavior and functionality. Unit tests are typically written using testing libraries like Jest and Enzyme.
The purpose of unit testing in React is to ensure that each component works as expected, independent of the rest of the application. It helps in identifying and fixing bugs, and provides confidence to developers when making changes or adding new features. Unit tests also serve as documentation of the expected behavior of a component and can act as a safety net against regressions.
Unit testing in React typically involves testing the rendering of components, checking the state and props, simulating user interactions, and validating the component's output or behavior. It also includes testing the component's lifecycle methods, event handlers, and any asynchronous operations.
What is the purpose of shallow rendering with enzyme in React unit tests?
The purpose of shallow rendering with Enzyme in React unit tests is to isolate the component being tested and only render its immediate child components, without including their implementation details. It allows for testing the component in isolation and focusing on the behavior or output of the component itself, rather than worrying about the behavior or output of its child components.
Shallow rendering helps to keep the tests more focused and concise by reducing the complexity of the rendered component and also improving the performance of the tests. It also provides a simplified API for interacting with the component, making it easier to set up and assert on the component's state, props, and rendered output.
By avoiding the rendering of deeply nested child components, shallow rendering ensures that the unit tests remain fast and efficient. Shallow rendering also abstracts away implementation details of child components, promoting better test maintainability and reducing the impact of changes made to child components on the tests of the parent component.
What is enzyme in React unit testing?
Enzyme is a JavaScript testing utility for React that makes it easier to test and assert on React components' behaviors and render output. It provides a simple and intuitive API to shallowly render React components, traverse and manipulate the rendered output, and simulate events. With Enzyme, developers can effectively test their React components in isolation by mounting them without rendering any of their child components.
Enzyme provides several methods to interact with the rendered components, such as finding elements by their CSS selector, grabbing elements by their component type, accessing and manipulating their props and state, and simulating events like clicks or form submissions. It also offers various methods for asserting and testing component behaviors, such as checking if a component is visible, if a certain element exists, or if certain callbacks are called.
Overall, Enzyme helps developers simplify the process of unit testing React components by providing a set of convenient tools and APIs specifically designed for testing React applications.
What is the importance of organizing unit tests in a structured folder hierarchy?
Organizing unit tests in a structured folder hierarchy is important for several reasons:
- Readability and maintainability: A structured folder hierarchy makes it easier to navigate and locate unit tests. It provides a clear and organized structure, making it simpler to find specific tests or groups of tests. This improves readability and reduces the time and effort required for developers to understand and modify the tests in the future.
- Scalability: As the number of unit tests grows, maintaining a well-organized folder structure becomes crucial. It allows developers to add new tests and groups of tests without cluttering the project's directory or impacting the overall test suite.
- Separation of concerns: A clear folder hierarchy facilitates logical separation of different areas or components of the software being tested. Tests related to a specific module or functionality can be grouped together, helping developers focus on relevant tests when working on a particular component.
- Test discoverability and automation: A well-structured folder hierarchy aids in automated test execution and reporting. Test discovery tools or frameworks can easily locate and run tests based on their location in the hierarchy. Additionally, automated testing pipelines or continuous integration systems can be configured to execute tests selectively based on the folder structure.
- Collaboration and team workflows: When working in a team, a structured folder hierarchy enables better collaboration and coordination among developers. It provides a standardized approach and helps maintain consistency in organizing tests across different team members or projects. This consistency makes it easier for team members to understand and contribute to each other's tests.
In summary, organizing unit tests in a structured folder hierarchy improves readability, maintainability, scalability, separation of concerns, test discoverability, automation, and collaboration within teams.