Best Vue.js Communication Tools to Buy in January 2026
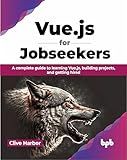
Vue.js for Jobseekers: A complete guide to learning Vue.js, building projects, and getting hired (English Edition)


Master Vue.js in 6 Days: Become a Vue.js Expert in Under a Week


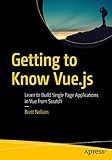
Getting to Know Vue.js: Learn to Build Single Page Applications in Vue from Scratch


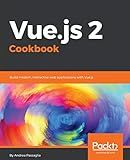
Vue.js 2 Cookbook: Build modern, interactive web applications with Vue.js


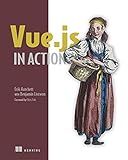
Vue.js in Action


Testing Vue.js Applications


Building Native Web Components: Front-End Development with Polymer and Vue.js


React: Grundlagen, fortgeschrittene Techniken und Praxistipps – mit TypeScript und Redux (German Edition)


Tailwind CSS Quickstart : Design Modern Websites with Utility-First CSS


In Vue.js, there are several ways to communicate between components. These techniques can be categorized into two main categories: parent-child communication and sibling communication.
Parent-child communication is the most straightforward method when components have a parent-child relationship. The parent component can pass data down to its child components using props. Props are custom attributes defined in the parent component's template and can be accessed in the child component using the props option. The child components can then use these props as local data.
On the other hand, child components can communicate with their parent components by emitting custom events. The child component can trigger events using the $emit method, passing any necessary data along with the event. The parent component can listen to these events by using the v-on directive, which binds an event listener to a method in the parent component.
When it comes to sibling communication, components that are not directly related as parent and child cannot communicate with each other directly. In such cases, you can utilize a shared state management pattern or a central event bus.
For shared state management, you can use state management libraries like Vuex. Vuex allows you to define a central store where components can access and modify the shared state. Components can retrieve state data by using the mapState helper, and they can modify the state by dispatching actions.
Alternatively, you can use a central event bus as a communication medium. A central event bus is a Vue instance that is used solely for communication between components. Components can emit events using this event bus, and other components can listen to those events and react accordingly. You can create a central event bus by creating a new Vue instance and exporting it as a separate module, which can be imported and used by various components.
Overall, Vue provides several effective methods for component communication, depending on the relationship between the components and the complexity of the application. Whether it is parent-child communication through props and custom events or sibling communication through shared state management or a central event bus, Vue enables easy and flexible inter-component communication.
How to pass data from parent to child components in Vue.js?
In Vue.js, there are several ways to pass data from a parent component to a child component:
-
Props: Use props to pass data from the parent component to the child component. In the parent component, define a prop and pass the data as an attribute in the child component's tag. In the child component, access the data using the props object. Parent Component:
Child Component:
{{ message }}
-
Vuex: Use Vuex for state management. Define a state in the store and access it in both the parent and child components. When the state changes in the parent component, the child component automatically updates. Parent Component:
{{ message }} Update Message
Child Component:
{{ message }}
-
Provide/Inject: Use the provide/inject feature to pass data from a parent component to its descendants without explicitly passing it through props. Parent Component:
Child Component:
{{ injectedMessage }}
These are the common ways to pass data from a parent component to a child component in Vue.js. Choose the most appropriate method based on your use case and component hierarchy.
What is component communication in Vue.js?
Component communication in Vue.js refers to the process of passing data between components in a Vue application. Vue.js provides various methods for component communication, including props, events, and a centralized event bus.
- Props: Props are used to pass data from a parent component to a child component. The parent component can pass data to a child component by binding attributes to the component in the template. The child component can then use the props to display or manipulate the data.
- Custom Events: Custom events are used to emit and listen for events between components. A child component can emit an event with data, and the parent component can listen for the event and respond to it. This allows communication from child to parent or between sibling components.
- Event Bus: Vue provides a built-in event bus mechanism called the Vue instance event bus. It can be used as a centralized communication hub that allows any component to emit and listen for events. Components can communicate with each other by emitting and listening to events on the event bus.
These mechanisms allow for effective communication between components in a Vue application, enabling the exchange of data and triggering actions based on events.
What is the difference between props and data in Vue.js component communication?
In Vue.js, there are two main ways to communicate between components: props and data.
- Props: Props are used to pass data from a parent component to a child component. They allow the parent component to pass down data to its child components, which can then use that data for display or other purposes. Props are one-way bindings, which means that changes made from the child component do not affect the parent component's data directly. They are read-only and cannot be directly modified by the child component.
Example usage: Parent component:
Child component:
In this example, the parent component passes the value of parentName as a prop to the child component. The child component receives it as name prop and uses it for display.
- Data: Data is used to manage the component's internal state. It is declared as a function in the component's options and can be accessed within the component's template, methods, and lifecycle hooks. Each component has its own isolated data object, which means that changes made to the data object in one component do not affect the data object in another component.
Example usage:
In this example, the component has its own internal message data property, which is initially set to 'Hello'. Clicking the button will call the updateMessage method, which updates the message property and triggers a re-render of the component.
In summary, props are used for one-way communication to pass data from a parent component to its child component, while data is used for managing the internal state of a component.
How to use Vuex for state management in Vue.js?
To use Vuex for state management in Vue.js, follow these steps:
- Install Vuex: Start by installing Vuex using npm or Yarn. Open your terminal and run the following command: npm install vuex
- Create a store: Create a JavaScript file to define and configure your Vuex store. Start by importing Vue and Vuex: import Vue from 'vue'; import Vuex from 'vuex'; Then, initialize Vuex by calling Vue.use(Vuex);. Next, define your store by creating a new instance of Vuex.Store. Pass an object as the argument, specifying the store's configuration: const store = new Vuex.Store({ state: {}, mutations: {}, actions: {}, getters: {}, }); Vuex store configuration includes the state, mutations, actions, and getters. state holds the application's data, mutations define how the state can be updated, actions handle asynchronous operations, and getters retrieve data from the state.
- Define state: Inside the state object, define the initial state of your application: state: { count: 0, user: null, }, In this example, we have defined a count variable and user variable in the state object.
- Define mutations: Mutations define how the state can be updated. Inside the mutations object, define mutation functions to update the state: mutations: { increment(state) { state.count++; }, setUser(state, user) { state.user = user; }, }, In this example, increment mutation increments the count variable, and setUser mutation updates the user variable.
- Define actions: Actions handle asynchronous operations and commit mutations to update the state. Inside the actions object, define action functions: actions: { async fetchUser({ commit }) { const response = await fetch('api/user'); const user = await response.json(); commit('setUser', user); }, }, In this example, fetchUser action fetches user data from an API, retrieves it, and commits the setUser mutation to update the state.
- Define getters: Getters retrieve data from the state. Inside the getters object, define getter functions: getters: { getCount: state => state.count, getUser: state => state.user, }, In this example, getCount getter retrieves the count variable from the state, and getUser getter retrieves the user variable.
- Use the store in Vue components: To use the Vuex store in your Vue components, import the store and configure it when creating your Vue instance: import store from './store'; new Vue({ store, // ... }).$mount('#app'); The store is now available in your Vue components. You can access the state, mutations, actions, and getters using this.$store. You can use the state in a component like this: this.$store.state.count. You can commit a mutation using this.$store.commit('increment'). You can dispatch an action using this.$store.dispatch('fetchUser'). You can retrieve data using a getter like this: this.$store.getters.getCount.
By following these steps, you can effectively use Vuex for state management in your Vue.js application.
How to communicate with server-side APIs in Vue.js components?
To communicate with server-side APIs in Vue.js components, you can use various methods such as vanilla JavaScript fetch() or third-party libraries like Axios.
Here is a step-by-step approach to communicating with server-side APIs in Vue.js components:
-
Install Axios (if you choose to use it): npm install axios
-
Import Axios in your component: import axios from 'axios';
-
Implement the API call in your component's method: export default { // ... methods: { fetchData() { axios.get('https://api.example.com/data') .then(response => { // handle success console.log(response.data); }) .catch(error => { // handle error console.log(error); }); } } }
-
You can call the API in a lifecycle hook or trigger it with some event: export default { // ... created() { this.fetchData(); } } Fetch Data
-
You can store the API response data in a Vue.js data property to utilize it in your template: export default { // ... data() { return { responseData: null }; }, methods: { fetchData() { axios.get('https://api.example.com/data') .then(response => { // handle success this.responseData = response.data; }) .catch(error => { // handle error console.log(error); }); } } }
-
Display the API response data in your component template:
Loading...
This is a basic example of how to communicate with server-side APIs in Vue.js components. You can customize it based on your API requirements and data handling needs.
