
Best Mouse Accessories to Buy in July 2026
![HOTLINEGAMES [Grip Upgrade] 2.0 Plus Mouse Anti Slip Grip Tape Compatible with Logitech G PRO Wireless Gaming Mouse Skins,Sweat Resistant,Cut to Fit,Easy Apply,Pro Performance Upgrade](https://cdn.blogweb.me/1/513f_Ik_A_Xgr_L_SL_160_800372ced1.jpg)
HOTLINEGAMES [Grip Upgrade] 2.0 Plus Mouse Anti Slip Grip Tape Compatible with Logitech G PRO Wireless Gaming Mouse Skins,Sweat Resistant,Cut to Fit,Easy Apply,Pro Performance Upgrade
- ENHANCED GRIP FOR BETTER CONTROL DURING INTENSE GAMING SESSIONS.
- UNIQUE DIAMOND TEXTURE IMPROVES SWEAT ABSORPTION, PREVENTING SLIPS.
- CUSTOM-FIT FOR RAZER MICE; EASY TO APPLY WITH INCLUDED TWEEZERS.
![HOTLINEGAMES [Grip Upgrade] 2.0 Plus Mouse Anti Slip Grip Tape Compatible with Logitech G PRO Wireless Gaming Mouse Skins,Sweat Resistant,Cut to Fit,Easy Apply,Pro Performance Upgrade](https://cdn.flashpost.app/flashpost-banner/brands/amazon.png)
![HOTLINEGAMES [Grip Upgrade] 2.0 Plus Mouse Anti Slip Grip Tape Compatible with Logitech G PRO Wireless Gaming Mouse Skins,Sweat Resistant,Cut to Fit,Easy Apply,Pro Performance Upgrade](https://cdn.flashpost.app/flashpost-banner/brands/amazon_dark.png)

Superglide Glass Mouse Skates for Logitech G Pro X Superlight 2 (Type-C, Black) - Polished Smooth Glide, Durable Gaming Mouse Feet
-
REVOLUTIONARY MICRO-SURFACE FOR SPEED & EXCEPTIONAL STOPPING POWER.
-
DURABLE TEMPERED GLASS DESIGNED FOR LONG-LASTING PERFORMANCE.
-
SMOOTH ROUND EDGE ENSURES THE SMOOTHEST GLIDE DURING PLAY.
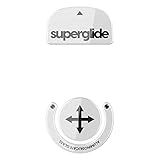
Superglide Glass Mouse Skates for Logitech G Pro X Superlight (Type-S, White) - Ultra Smooth Glide, Polished Round Edge, Compatible with G Pro Superlight 2, Superlight Mouse Skates
- EXPERIENCE ULTRA-SMOOTH GLIDES FOR PRECISION AIMING AND TRACKING.
- DURABLE TEMPERED GLASS ENSURES LONG-LASTING PERFORMANCE WITHOUT WEAR.
- DESIGNED FOR ESPORTS PROS SEEKING UNBEATABLE ACCURACY AND SPEED.

ANKHOH Case for Logitech Lift Vertical Ergonomic Mouse, Travel Carrying Holder Storage Box for Logi Wireless Bluetooth Cordless Upright Mouse - Bag Only (Grey)
-
TAILORED FIT FOR LOGITECH VERTICAL MOUSE, ENSURING PERFECT PROTECTION.
-
WATERPROOF, DUSTPROOF, AND SHOCK-RESISTANT FOR ALL-ROUND DURABILITY.
-
LIGHTWEIGHT AND PORTABLE; IDEAL FOR TRAVEL AND EVERYDAY USE.

Soarking Charging Dock for Logitech Computer Mouse G Pro X Superlight 2/1,G502/G502X/G502X Plus Lightspeed,G703,G903 Lightspeed and G PRO Computer Mice Powerplay Charging System
-
UNIVERSAL COMPATIBILITY: SUPPORTS POPULAR LOGITECH MICE MODELS SEAMLESSLY.
-
COMPACT DESIGN: SPACE-SAVING DOCK PERFECT FOR HOME OR TRAVEL USE.
-
SECURE NON-SLIP BASE: ENSURES STABILITY ON ANY SURFACE, HASSLE-FREE CHARGING.
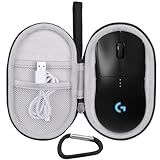
Mouse Case for Logitech G PRO X Superlight 2/2 DEX/ 2c for X Superlight for Pro 2 Lightspeed Wireless/Wired Gaming Mouse (Case Only) (Black-Grey)
- CUSTOM FIT: DESIGNED SPECIFICALLY FOR LOGITECH G PRO SERIES MICE.
- ULTIMATE PROTECTION: SHOCK AND WATER-RESISTANT HARD CASE ENSURES LONGEVITY.
- CONVENIENT STORAGE: BUILT-IN POCKET AND EASY-ACCESS ZIPPER FOR ACCESSORIES.
To customize the scroll wheel behavior on a Logitech mouse, you can follow these steps:
- Install Logitech Options software: First, download and install the Logitech Options software from the Logitech website. This software allows you to personalize the settings and features of your Logitech mouse.
- Open Logitech Options: Once the software is installed, open it on your computer.
- Select your mouse: Logitech Options will detect your connected Logitech mouse automatically. Click on the mouse icon to continue.
- Go to the scrolling settings: In the left-hand menu of Logitech Options, click on "Point & Scroll" to access scrolling-related options.
- Customize scroll wheel behavior: Here, you will find various options to customize the scrolling behavior. You can choose to enable or disable "SmartShift" – the automatic mode that switches between precision and hyper-fast scrolling – based on your preferences.
- Adjust scroll direction and speed: You can also modify the scroll wheel's direction by choosing between "Natural" or "Inverted". Adjusting the scroll speed allows you to increase or decrease the number of lines scrolled with each wheel rotation.
- Additional options: Logitech Options may also provide other scroll-related settings like horizontal scrolling or gesture customization. You can explore these features based on your specific mouse model.
- Apply and save changes: After customizing the scroll wheel behavior, click on the "Apply" button to save the changes and make them effective. You can also customize other settings using Logitech Options if desired.
Remember to periodically check for software updates from Logitech, as they often release new features and improvements for their devices.
What is Logitech Flow?
Logitech Flow is a software feature offered by Logitech that allows users to control multiple computers with a single mouse and keyboard. It enables seamless cross-computer control and file sharing between compatible Logitech devices and computers connected to the same network. With Logitech Flow, users can effortlessly switch between computers and even copy and paste content across different systems. It is particularly useful for professionals who work with multiple computers simultaneously or wish to streamline their workflow.
What is Logitech Options?
Logitech Options is a software that allows users to customize the settings and functionality of Logitech devices such as keyboards, mice, and other peripherals. It provides advanced customization options such as remapping keys, creating custom shortcuts, adjusting sensitivity levels, and configuring application-specific settings. Logitech Options is available for both Windows and Mac operating systems and helps enhance the user experience with Logitech devices.
How to enable middle-click scrolling on a Logitech mouse?
To enable middle-click scrolling on a Logitech mouse, you can follow these steps:
- Open the Logitech SetPoint software on your computer. If you haven't installed it already, you can download it from the Logitech website and install it.
- Once the software is open, click on the "Mouse" tab at the top.
- In the Mouse tab, you will see a list of available mouse buttons. Look for the middle button or scroll wheel button and click on it.
- In the middle button settings, make sure it is set to "Middle Button" or "Middle-Click" function.
- If the option is not available, look for the "DPI Shift" or "Scrolling" options, and check if there is a setting related to middle-click scrolling. Enable it if available.
- Apply the changes and close the SetPoint software.
Now, the middle button or scroll wheel button should work as a middle-click, allowing you to scroll in applications that support this feature.
How to customize horizontal scrolling on a Logitech mouse?
To customize horizontal scrolling on a Logitech mouse, you can follow these steps:
- Install Logitech's software: Logitech mice come with software called Logitech Options or Logitech SetPoint, which allows you to customize various features. Download and install the software from the Logitech website if you don't already have it.
- Open Logitech Options/SetPoint: Launch the Logitech Options or Logitech SetPoint software on your computer. It should automatically detect your Logitech mouse.
- Select your mouse: In the software interface, click on your mouse model to customize its settings.
- Locate horizontal scrolling settings: Look for an option related to horizontal scrolling. This option might be called "Wheel tilt" or "Thumb wheel," depending on your mouse model.
- Customize the horizontal scrolling: Click on the horizontal scrolling option and select how you want it to behave. You may have options like "Left and right tilt," "Zoom," or "Horizontal scrolling."
- Adjust scroll sensitivity: Some Logitech software also allows you to adjust the scrolling sensitivity. If you want to change how fast or slow the horizontal scrolling is, look for a sensitivity or speed setting and adjust it accordingly.
- Apply the changes: Once you have customized the horizontal scrolling and sensitivity settings, click on the "Apply" or "OK" button to save the changes.
- Test the changes: Try horizontal scrolling on a web page, document, or other applications that support it. Verify that the scrolling direction and speed match your preferences.
Remember to check for software updates periodically to ensure you have the latest features, bug fixes, and compatibility improvements for your Logitech mouse.
How to create custom profiles for different applications on a Logitech mouse?
To create custom profiles for different applications on a Logitech mouse, you can follow these steps:
- Install Logitech G HUB software: Begin by downloading and installing the Logitech G HUB software from the official Logitech website.
- Launch Logitech G HUB: After installation, open the Logitech G HUB software.
- Connect your Logitech mouse: Ensure your Logitech mouse is connected to your computer via USB or any wireless technology supported by your mouse.
- Identify the applications you want to create profiles for: Make a list of the applications where you want to set up custom profiles. Keep in mind that the Logitech G HUB software allows you to create profiles for specific applications or games.
- Navigate to the "Profiles" tab: On the left-hand side of the Logitech G HUB interface, click on the "Profiles" tab.
- Add a new profile: Click on the "+" sign within the profiles section to add a new profile. Give it a name, preferably related to the application you intend to create a profile for.
- Assign the profile to an application: In the "Assignments" tab, click on "Enable per profile backlighting" (this option may vary depending on your specific mouse model). Then click on the "New Application" button. Browse and select the executable file of the application for which you want to create a profile.
- Customize functions and settings: Once you have assigned the profile to the appropriate application, you can customize the settings and functions for the profile. This may include button assignments, DPI sensitivity, macros, lighting effects, and more.
- Save the profile: After setting up the profile, click on the "Back" button to return to the main interface. Then click on the "Save" button to save your changes and sync them with your Logitech mouse.
- Repeat for other applications: Follow steps 6-9 to create profiles for other applications on your Logitech mouse.
By following these steps, you can create custom profiles for different applications on your Logitech mouse using the Logitech G HUB software. Remember to save your changes and make sure the profiles are properly assigned to the respective applications.
How to adjust scroll wheel resistance on a Logitech mouse?
To adjust the scroll wheel resistance on a Logitech mouse, follow these steps:
- Launch the Logitech Options software on your computer. If you do not have it installed, you can download it from the Logitech website.
- Once the software launches, locate and select your Logitech mouse from the list of connected devices.
- In the settings menu for your mouse, look for the option related to scrolling. It may be labeled as "Scrolling" or "Wheel settings" depending on the version of the software you are using.
- Within the scrolling settings, you should find a section for "Scroll wheel tension" or "Scroll wheel resistance." Adjust this setting to your desired level by either increasing or decreasing the resistance.
- Test the scroll wheel after making the adjustments to check if the resistance has been properly adjusted. If needed, go back to the settings menu and tweak the resistance until you are satisfied.
Note: The availability of scroll wheel resistance adjustment may vary depending on the model of your Logitech mouse. Some models may not have this feature. If you are unable to find the option, refer to the user manual or support documentation for your specific mouse model.