
Best Code Quality Tools to Buy in July 2026
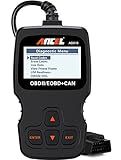
ANCEL AD310 Classic Enhanced Universal OBD II Scanner Car Engine Fault Code Reader CAN Diagnostic Scan Tool, Read and Clear Error Codes for 1996 or Newer OBD2 Protocol Vehicle (Black)
- COMPACT & STURDY DESIGN: LIGHTWEIGHT, PORTABLE, AND BUILT TO LAST.
- FAST ISSUE DETECTION: QUICKLY READS & CLEARS ENGINE CODES IN SECONDS.
- WIDE COMPATIBILITY: SUPPORTS ALL OBDII PROTOCOLS FOR VERSATILE USE.


BlueDriver Bluetooth Pro OBDII Scan Tool for iPhone & Android - No Subscription Fee - OBD2 Car Scanner and Code Reader - Diagnose Check Engine, ABS, SRS, Airbag & 7000+ Issues on Vehicles 1996+
- ENHANCED DIAGNOSTICS FOR DIY REPAIRS - NO PROFESSIONAL NEEDED!
- WIRELESS BLUETOOTH CONNECTIVITY FOR HASSLE-FREE SCANNING.
- ZERO SUBSCRIPTION FEES - ONE PURCHASE, LIFETIME ACCESS!
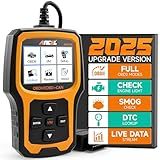
ANCEL AD410 Enhanced OBD2 Scanner, Vehicle Code Reader for Check Engine Light, Automotive OBD II Scanner Fault Diagnosis, OBDII Scan Tool for All OBDII Cars 1996+, Black/Yellow
-
WIDE COMPATIBILITY: WORKS WITH ALL OBDII VEHICLES FROM 1996+ WORLDWIDE.
-
CRITICAL FUNCTIONALITY: QUICKLY READ/CLEAR CODES WITH 42,000 DTC LOOKUPS.
-
USER-FRIENDLY DESIGN: CLEAR 2.4 DISPLAY AND INTUITIVE INTERFACE FOR ALL USERS.
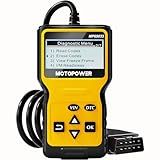
MOTOPOWER MP69033 Car OBD2 Scanner Code Reader Engine Fault Scanner CAN Diagnostic Scan Tool for All OBD II Protocol Cars Since 1996, Yellow
-
POWERFUL MULTI-FUNCTIONS: READS, ERASES CODES & SHOWS REAL-TIME DATA!
-
WIDE COMPATIBILITY: SUPPORTS 1996+ VEHICLES; 9 PROTOCOLS & 6 LANGUAGES!
-
USER-FRIENDLY DESIGN: CLEAR 2.8 LCD, NO BATTERY NEEDED, COMPACT & DURABLE!
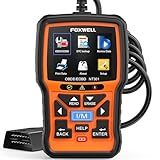
FOXWELL NT301 OBD2 Scanner Live Data Professional Mechanic OBDII Diagnostic Code Reader Tool for Check Engine Light
- SIMPLIFY DIAGNOSTICS WITH REAL-TIME DATA AND EASY FAULT CODE READING.
- COMPATIBLE WITH MOST OBDII VEHICLES FOR BROAD USABILITY AND CONVENIENCE.
- TRUSTED BY MECHANICS; ENJOY LIFETIME UPDATES AND DEDICATED SUPPORT.
FIXD Bluetooth OBD2 Scanner for Car - Car Code Readers & Scan Tools for iPhone/Android - Wireless OBD2 Auto Diagnostic Tool - Check Engine & Fix All Vehicles 1996+ (1 Pack w/Free FIXD Premium Trial)
- SAVE $1000S ON REPAIRS BY DIAGNOSING 7,000+ CAR ISSUES INSTANTLY.
- TRY FIXD PREMIUM FREE FOR EXPERT ADVICE AND ACCURATE REPAIR ESTIMATES.
- AVOID BUYING A LEMON WITH PRE-PURCHASE SCANS FOR HIDDEN CAR ISSUES.
OBD2 Scanner Diagnostic Tool, Check Engine Code Reader OBD2 Scanner with Reset, Mode 6, Mode 8 & I/M Readiness, Auto Check Engine Light Car Diagnostic Scan Tool for All OBDII Car Since 1996
-
BUILT-IN 35,901 DTC LIBRARY FOR ACCURATE FAULT DIAGNOSES!
-
COMPATIBLE WITH 98% OF VEHICLES & 10 LANGUAGES FOR GLOBAL USE!
-
CONVENIENT DATA PRINTING & LIFETIME FREE UPDATES INCLUDED!
To set up code quality gates in SonarQube, follow these steps:
- Install and configure SonarQube: Download the latest version of SonarQube and install it on your server. Configure the server by setting up the necessary properties such as database connectivity and server port.
- Analyze your project: Analyze your project using SonarQube scanner. You can use either the SonarQube Scanner CLI or integrate it with build tools like Maven or Gradle. This step scans your project's source code and generates a report with metrics and issues related to code quality.
- Define quality gates: In SonarQube, quality gates are a set of predefined conditions or rules that measure the code quality of your project. You need to define these conditions based on your project requirements and industry standards. Conditions may include criteria such as code duplication, code coverage, code smells, and security vulnerabilities.
- Configure quality gate status: You can specify the status that should be considered as "Passed" or "Failed" for your quality gates. For example, if you have defined a specific threshold for code coverage, you can set the status as "Failed" if the code coverage falls below that threshold.
- Associate quality gates with your project: Once the quality gates are defined, associate them with your project. This step ensures that the quality gates are applied to the project's analysis results.
- Analyze and review the results: Run the analysis of your project and review the results. SonarQube will automatically evaluate the quality gate conditions against your project's metrics. It will indicate whether the gate has passed or failed based on the configured status.
- Implement necessary changes: If the quality gate fails, you need to understand the issues highlighted in the SonarQube report and take necessary actions to fix them. This may involve fixing code duplication, improving test coverage, addressing code smells, or resolving security vulnerabilities.
- Continuously monitor and improve: Setting up code quality gates is not a one-time task. It is essential to continuously monitor the code quality and review the quality gate results. Regularly reevaluate and update the quality gate conditions to ensure they align with the evolving requirements and standards of your project.
By following these steps, you can successfully set up code quality gates in SonarQube and improve the overall quality of your software projects.
How to set up SonarQube with Visual Studio?
To set up SonarQube with Visual Studio, follow these steps:
- Install SonarQube: a. Download the latest version of SonarQube from the official website (https://www.sonarqube.org/downloads/). b. Extract the downloaded file to a desired location on your machine. c. Open a command prompt, navigate to the extracted folder, and run the following command to start SonarQube: bin\windows-x86-64\StartSonar.bat
- Install SonarScanner for MSBuild: a. Download the latest version of SonarScanner for MSBuild from the official website (https://docs.sonarqube.org/latest/analysis/scan/sonarscanner-for-msbuild/). b. Extract the downloaded file to a desired location on your machine.
- Configure SonarQube in Visual Studio: a. Open Visual Studio and go to Extensions and Updates from the Tools menu. b. Search for "SonarLint" and install the extension. c. Restart Visual Studio. d. Go to Tools > Options > SonarLint for Visual Studio and provide the SonarQube server URL, login credentials (if required), and project key.
- Configure your project for analysis: a. Open the solution in Visual Studio. b. Right-click on the solution in the Solution Explorer and select "Manage NuGet packages for solution". c. Search for "SonarAnalyzer.CSharp" and "SonarAnalyzer.VisualBasic" packages and install them for all the projects in the solution. d. Right-click on the project in the Solution Explorer and select "Unload Project". e. Right-click on the unloaded project and select "Edit Project File". f. Add the following code snippet at the end of the project file: http://localhost:9000MyProjectKeyReplace http://localhost:9000 with the URL of your SonarQube server and MyProjectKey with the project key you want to use. g. Save the changes and right-click on the project again and select "Reload Project".
- Analyze your project: a. Open a command prompt and navigate to the location where you extracted the SonarScanner for MSBuild. b. Run the following command to analyze your project: SonarScanner.MSBuild.exe begin /k:"MyProjectKey" /d:sonar.host.url="http://localhost:9000" /d:sonar.login="mySonarQubeToken" /d:sonar.verbose=true Replace MyProjectKey with the project key you specified in the project file and mySonarQubeToken with a valid authentication token or leave it blank for anonymous access. c. Build your project in Visual Studio. d. Run the following command to finish the analysis: SonarScanner.MSBuild.exe end /d:sonar.login="mySonarQubeToken"
You should now be able to see the analysis results in the SonarQube server's dashboard.
How to track technical debt in SonarQube?
To track technical debt in SonarQube, follow these steps:
- Install and configure SonarQube on your system.
- Create a project in SonarQube for which you want to track technical debt.
- Analyze the code of your project using SonarQube. This can be done by running a build scanner (such as SonarScanner or sonar-maven-plugin) on your project's source code.
- Once the analysis is complete, open SonarQube and go to your project's dashboard.
- In the dashboard, you will find various categories and metrics related to your code's quality. Look for the "Technical Debt" section.
- In the "Technical Debt" section, you will find a breakdown of the overall technical debt in your project. Debt Ratio: It shows the percentage of code that has technical debt. Debt on New Code: It shows the amount of technical debt on new code added since the last analysis. Debt on Legacy Code: It shows the amount of technical debt present in the existing codebase. Total Technical Debt: It gives you the cumulative technical debt figure for your project.
- You can click on any of these metrics to get a detailed breakdown of the specific issues contributing to the technical debt.
- SonarQube also provides a list of code smells, bugs, and vulnerabilities contributing to the technical debt as identified during the analysis.
- You can customize the technical debt thresholds and rules by setting up quality profiles in the SonarQube project settings.
- Furthermore, SonarQube provides a historical view of technical debt to track its trends over time.
By regularly analyzing your code in SonarQube and tracking the technical debt metrics, you can effectively monitor and manage the technical debt in your project.
How to set up code coverage in SonarQube?
To set up code coverage in SonarQube, you need to follow these steps:
- Install SonarQube: Download the SonarQube server from the official website and install it on your machine.
- Install SonarScanner: Download the SonarScanner tool and set it up on your local machine. SonarScanner is used to analyze your code and send the results to the SonarQube server.
- Configure SonarScanner: In the SonarScanner configuration file (sonar-project.properties), specify the location of your code and the SonarQube server details. For example: sonar.projectKey=my_project sonar.sources=src sonar.host.url=http://localhost:9000 sonar.login=admin sonar.password=admin
- Enable code coverage: SonarQube supports multiple code coverage tools, such as JaCoCo, Cobertura, and OpenCover. Choose the code coverage tool of your choice and integrate it into your build process.
- Generate code coverage report: Configure your build system to generate the code coverage report using the selected code coverage tool. This typically involves adding the necessary build tasks or commands to your build script.
- Import code coverage report into SonarQube: Once the code coverage report is generated, use the SonarScanner command-line tool to analyze your code and import the code coverage report to the SonarQube server. Run the following command in your project directory: sonar-scanner This command will start the analysis and upload the code coverage report to the SonarQube server.
- View code coverage in SonarQube: Open your SonarQube server in a web browser and navigate to your project. You should now see the code coverage metrics displayed in the project dashboard.
Remember to regularly run the SonarScanner command to update the code coverage metrics in SonarQube as you make changes to your codebase.
How to define custom quality profiles in SonarQube?
To define custom quality profiles in SonarQube, follow these steps:
- Log in to your SonarQube instance as an administrator.
- Go to the Quality Profiles page by clicking on "Quality Profiles" in the top navigation bar.
- Click on the "Create" button to create a new quality profile.
- Enter a name and an optional description for the new quality profile.
- Select a parent profile from the drop-down list. This will determine which rules are included in the new profile. If you want to start with a clean slate, select "None" as the parent profile.
- Click on the "Create" button to create the new quality profile.
- On the quality profile page, you can now add or remove rules according to your requirements. Rules are organized into different categories, such as "Bugs", "Code Smells", and "Security Vulnerabilities". Expand a category to see the list of rules in that category.
- To add a rule, click on the checkbox next to the rule name. To remove a rule, uncheck the checkbox.
- Use the search box to find specific rules or filter by tags.
- You can also adjust the severity of each rule by selecting a different severity level from the drop-down list next to each rule.
- Once you have made all the necessary changes, click on the "Save" button to save the modifications to the quality profile.
Note: Custom quality profiles are available starting from SonarQube 6.2.