Best AirPrint-Enabled Wireless Printers to Buy in July 2026
HP DeskJet 2827e Wireless All-in-One Color Inkjet Printer, Scanner, Copier, Best-for-Home, 3 Month Instant Ink Trial Included, AI-Enabled (6W7F5A)
-
EFFORTLESS PRINTING: SMART LAYOUT WITH HP AI, SAVES TIME & PAGES.
-
STAY CONNECTED: RELIABLE WI-FI RESOLVES ISSUES AUTOMATICALLY!
-
INSTANT INK INCLUDED: 3 MONTHS FREE INK DELIVERY FOR STRESS-FREE PRINTING.


Canon MegaTank G3270 All-in-One Wireless Inkjet Printer. for Home Use, Print, Scan and Copy
- ENJOY 2 YEARS OF INK INCLUDED-NO MORE UNEXPECTED COSTS!
- PRINT UP TO 6,000 B/W AND 7,700 COLOR PAGES WITH ONE INK SET!
- SAVE UP TO $1,000 ON INK-GET MORE FOR LESS!
HP Envy Inspire 7255e Wireless Color Inkjet Printer, Print, scan, copy, Easy setup, Mobile printing, Best-for-home, 3 month Instant Ink trial included, AI-enabled (1W2Y9A)
-
VIBRANT, BORDERLESS PRINTS IN MULTIPLE SIZES FOR ALL PROJECTS!
-
EASY SETUP & WIRELESS PRINTING FROM ANY DEVICE.
-
ENJOY 3 MONTHS OF HASSLE-FREE INK DELIVERY WITH HP+.

HP OfficeJet Pro 8125e Wireless All-in-One Color Inkjet Printer, Print, scan, Copy, ADF, Duplex Printing Best-for-Home Office, 3 Month Instant Ink Trial Included, AI-Enabled (405T6A)
-
FAST, PROFESSIONAL COLOR PRINTING UP TO 20 PPM FOR HOME OFFICES.
-
HP AI OPTIMIZES PRINTS, ENSURING NO WASTED PAGES OR AWKWARD LAYOUTS.
-
WIRELESS CONNECTIVITY AND MOBILE APP FOR HASSLE-FREE PRINTING ANYWHERE.
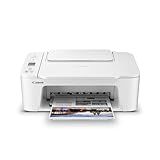
Canon PIXMA TS3720 Wireless All-in-One Printer for Basic Home Printing, White
- ALL-IN-ONE FUNCTIONALITY: PRINT, COPY, SCAN FOR ULTIMATE CONVENIENCE.
- FAST PRINT SPEEDS: QUICKLY PRINT UP TO 7.7 B/W IMAGES PER MINUTE.
- EASY MOBILE PRINTING: PRINT EFFORTLESSLY FROM YOUR SMARTPHONE OR TABLET.
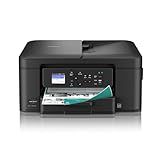
Brother Work Smart 1360 Wireless Color Inkjet All-in-One Printer with Automatic Duplex Printing and 1.8” Color Display | Includes Refresh Subscription Trial(1) (MFC-J1360DW) (Uses LC501 Series Inks)
- ALL-IN-ONE PRINTER: PRINT, COPY, SCAN-PERFECT FOR HOME OFFICES!
- EFFORTLESS CLOUD PRINTING: CONNECT TO GOOGLE DRIVE, DROPBOX, AND MORE.
- FAST PRINTING SPEEDS: UP TO 16 PPM IN BLACK AND 9 PPM IN COLOR!
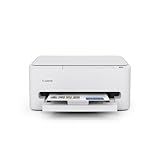
![Canon Megatank G3290 All-in-One Wireless Supertank [Megatank] Printer | Print, Copy Scan | Mobile Printing |2.7" LCD Color Touchscreen | Auto Duplex](https://cdn.blogweb.me/1/41_S9v_If_HBSL_SL_160_bcd3a811c3.jpg)
Canon Megatank G3290 All-in-One Wireless Supertank [Megatank] Printer | Print, Copy Scan | Mobile Printing |2.7" LCD Color Touchscreen | Auto Duplex
- PRINT UP TO 6,000 BLACK & WHITE PAGES WITH INCLUDED INKS!
- SAVE UP TO $1,000 ON INK COSTS WITH OUR EFFICIENT SYSTEM!
- USER-FRIENDLY 2.7” COLOR TOUCHSCREEN FOR EASY OPERATION!
Canon PIXMA TS4320 Wireless Color Inkjet Printer for Duplex Printing, White – Cost Efficient Home Printer with Copier/Scanner, Compact Design, Easy Setup, 1 Year Limited Warranty
- AFFORDABLE ALL-IN-ONE PRINTER FOR HOME AND HYBRID WORKSPACES.
- SHARP TEXT AND VIBRANT COLORS WITH A HYBRID INK SYSTEM.
- EASY SMARTPHONE SETUP FOR QUICK PRINTING, SCANNING, AND COPYING.
To enable AirPrint on a wireless printer, follow these steps:
- Check compatibility: Ensure that your printer supports AirPrint. Only certain models are compatible with this feature. You can usually find this information in the printer's manual or by visiting the manufacturer's website.
- Connect your printer to the same Wi-Fi network as your iOS device: Both your iPhone/iPad and the printer should be connected to the same Wi-Fi network. If not, connect them accordingly.
- Update firmware (if required): If your printer has outdated firmware, it may not support AirPrint. Visit the manufacturer's website and check for any available firmware updates for your printer model. Install the latest firmware using the provided instructions.
- Enable AirPrint: On your printer's control panel, navigate through the settings menu to find the AirPrint or Wireless Direct option. Enable this feature to allow AirPrint functionality.
- Verify AirPrint compatibility on your iOS device: On your iPhone or iPad, open an app that supports AirPrint (e.g., Mail or Photos). Tap the share icon within the app (usually represented by a square with an upward arrow). If your printer is AirPrint compatible, you should see it listed under the Printer option. Select your printer.
- Adjust print settings (optional): Depending on the app or document you are printing, you can adjust print settings such as paper size, orientation, quality, and the number of copies.
- Print your document: Once you have selected your desired print settings, tap the Print button to send the document to your wireless printer. The printer should start printing the document accordingly.
Remember, AirPrint is an iOS feature, so Android devices do not have native support for it. However, certain third-party apps or printer manufacturer apps may offer similar functionality.
What steps do I need to follow to set up AirPrint on my printer?
To set up AirPrint on your printer, follow these steps:
- Check printer compatibility: Ensure your printer is compatible with AirPrint. Visit Apple's AirPrint support page or refer to the printer manual to verify compatibility.
- Update printer firmware: If available, update the printer's firmware to the latest version. Check the manufacturer's website for firmware updates and follow the instructions for installation.
- Connect printer to Wi-Fi: Make sure your printer is connected to the same Wi-Fi network as your iOS device or Mac. Use the printer's built-in menu or a computer to connect the printer to Wi-Fi.
- Enable AirPrint on printer: Access your printer's settings from its control panel or web portal. Look for an option to enable AirPrint or Bonjour Printing, and toggle it ON. Save your changes.
- Update iOS device or Mac: Ensure your iOS device (iPhone, iPad, or iPod Touch) or Mac is updated to the latest software version. These updates often include improvements and bug fixes related to AirPrint.
- Test AirPrint: Open any app on your iOS device or Mac that supports AirPrint and select the Print option. If your printer is properly set up and connected to the same Wi-Fi network, it should appear as an available printer. Select it, configure any additional settings, and then print a test page.
- Troubleshooting: If the printer doesn't appear as an available device, double-check the Wi-Fi connection, ensure you're on the same network, and verify AirPrint is enabled on the printer. Restarting your router and printer may help resolve connectivity issues. If problems persist, consult the printer manual or contact the manufacturer's support for further assistance.
Note: AirPrint requires the printer and iOS device or Mac to be connected to the same Wi-Fi network. Also, not all printers support AirPrint, so ensure your printer is compatible beforehand.
What is the process of enabling AirPrint on an Epson wireless printer?
To enable AirPrint on an Epson wireless printer, you can follow these steps:
- Ensure that your Epson printer and your iOS device (iPhone, iPad) are connected to the same Wi-Fi network.
- Make sure your printer is turned on and functioning properly.
- On your iOS device, open the "Settings" app.
- Scroll down and tap on "Wi-Fi."
- Find and select the Wi-Fi network that your printer is connected to.
- Open an app (such as Mail, Safari, or Photos) on your iOS device that supports AirPrint.
- Open the file or content you want to print.
- Tap the "Share" button, which looks like a box with an arrow pointing upward.
- In the sharing options, you should see a "Print" option. Tap on it.
- Your iOS device will search for available AirPrint printers on the Wi-Fi network.
- When you find your Epson printer listed, tap on it to select it.
- Configure any desired print settings (number of copies, paper size, etc.) through the printer options if required.
- Finally, tap on the "Print" button to send the print job wirelessly to your Epson printer.
Note: Some older Epson printer models might not support AirPrint. In that case, you can check for alternate printing solutions, such as using the Epson iPrint app or connecting via a computer.
How to configure AirPrint settings on a wireless printer?
To configure AirPrint settings on a wireless printer, follow these steps:
- Connect the printer to your wireless network: Power on the printer and ensure it is connected to the same Wi-Fi network as your iOS device (iPhone, iPad).
- Access the printer's web interface: Open a web browser on a computer connected to the same Wi-Fi network as the printer. Type the printer's IP address into the browser's address bar and press Enter. You may find the printer's IP address by printing out a network configuration page or by checking the printer's settings.
- Enable AirPrint: Once you are on the printer's web interface, navigate to the network settings or system configuration section. Look for an option to enable AirPrint or mDNS (Multicast DNS), and enable it. Save the settings and exit the printer's web interface.
- Update firmware (if necessary): Check if there are any firmware updates available for your printer on the manufacturer's website. Download and install the latest firmware update for your printer. Follow the instructions provided by the manufacturer to update the firmware.
- Test AirPrint: On your iOS device, make sure it is connected to the same Wi-Fi network as the printer. Open any app that supports AirPrint (e.g., Safari, Mail, Notes). Tap the share icon (a square with an arrow pointing up) within the app. Look for the Print option and tap it. Your printer should appear as an available printer. Select it. Adjust any printer settings if necessary (e.g., paper size, number of copies), and then tap Print.
If the printer does not appear as an available printer, double-check that AirPrint is enabled on the printer and that it is connected to the same Wi-Fi network as your iOS device. Additionally, make sure there are no firewall or security settings blocking AirPrint communication on your network.
Note: The specific steps may vary depending on your printer model and manufacturer. Refer to the printer's user manual or contact the manufacturer's support for detailed instructions.
What is the process of enabling AirPrint on a Samsung wireless printer?
Enabling AirPrint on a Samsung wireless printer involves several steps. Here is a general process to enable AirPrint on Samsung wireless printers:
- Ensure your Samsung printer is connected to the same Wi-Fi network as your iOS device (iPhone, iPad, or iPod Touch).
- Ensure that your Samsung printer supports AirPrint. Not all Samsung printers have this feature, so check if your model is AirPrint-compatible.
- Make sure that your Samsung printer is turned on and ready for printing.
- On your iOS device, open an app that supports AirPrint, such as Safari, Notes, or Mail.
- Tap the "Share" or "Print" option within the app to open the print settings.
- In the print settings, select your printer from the list of available printers. If your Samsung printer doesn't appear, tap the "Select Printer" option and choose the printer from there.
- If prompted, enter any necessary settings such as the number of copies or paper size.
- Finally, tap the "Print" button to send the print job to your Samsung printer.
Note: Make sure that you have the latest firmware installed on your Samsung printer, as this can sometimes affect AirPrint functionality. You can check for firmware updates on the Samsung website or through the printer's settings menu.
How do I print from my Mac using AirPrint on a wireless printer?
To print from your Mac using AirPrint on a wireless printer, follow these steps:
- Ensure that your Mac and the wireless printer are connected to the same Wi-Fi network.
- Open the document or file you want to print.
- Navigate to the "File" menu at the top of the screen and select "Print" or use the shortcut Command + P.
- The Print dialog box will appear. Ensure that the correct printer is selected from the "Printer" dropdown menu. The AirPrint-enabled printer should be listed.
- Configure the print settings according to your requirements, such as the number of copies, paper size, orientation, etc.
- Once all settings are adjusted, click on the "Print" button to send the document to the wireless printer.
- Wait for the printer to process the print job and complete the printing process.
Note: Ensure that your printer is AirPrint-compatible. If it's not, you may need to use third-party software or install the necessary drivers to enable printing from your Mac.