Best Tools for Laravel AWS Setup to Buy in February 2026
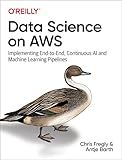
Data Science on AWS: Implementing End-to-End, Continuous AI and Machine Learning Pipelines


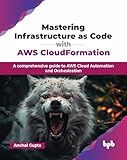
Mastering Infrastructure as Code with AWS CloudFormation: A comprehensive guide to AWS Cloud Automation and Orchestration (English Edition)


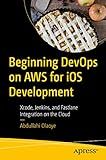
Beginning DevOps on AWS for iOS Development: Xcode, Jenkins, and Fastlane Integration on the Cloud


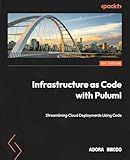
Infrastructure as Code with Pulumi: Streamlining Cloud Deployments Using Code


Implementing GitOps with Kubernetes: Automate, manage, scale, and secure infrastructure and cloud-native applications on AWS and Azure


AWS for Solutions Architects: The definitive guide to AWS Solutions Architecture for migrating to, building, scaling, and succeeding in the cloud


Kubeflow Operations Guide: Managing Cloud and On-Premise Deployment


To install Laravel on AWS, follow these steps:
- Launch an EC2 instance: Sign in to the AWS Management Console and open the EC2 service page. Click on the "Launch Instance" button. Choose an Amazon Machine Image (AMI), typically a Linux-based one like Amazon Linux or Ubuntu. Select an instance type based on your requirements and click "Next". Configure instance details like the number of instances, network settings, etc., and click "Next". Add storage if needed and configure any additional settings. Create or select a security group that allows inbound access on port 80 and 22 (for SSH). Review the instance details and click "Launch".
- Connect to the EC2 instance: Once the instance is launched, connect to it using SSH. For Linux/Mac, use the terminal, and for Windows, use a tool like PuTTY. Obtain the public IP or DNS of the instance from the EC2 management console. Run the SSH command with the obtained IP or DNS to connect to the instance.
- Install the necessary software: Update the package manager by running: sudo apt-get update. Install PHP, composer, and other dependencies by running: sudo apt-get install php php-cli php-mbstring php-dom composer unzip git.
- Install Laravel: Navigate to the folder where you want to install Laravel by running: cd /var/www/html. Download the Laravel installer by running: composer global require laravel/installer. Create a new Laravel project by running: composer create-project --prefer-dist laravel/laravel projectName.
- Configure the web server: Install and configure a web server like Nginx or Apache to serve the Laravel application. Refer to the respective documentation for detailed instructions.
- Set the proper permissions: Grant write permissions to the storage and bootstrap/cache folders by running: sudo chmod -R 777 storage bootstrap/cache. Run the following commands to generate the application key and clear the cache: cd /var/www/html/projectName php artisan key:generate php artisan config:cache
- Configure the database: Create a new database for your Laravel application on AWS RDS. Update the .env file in the Laravel project folder with the appropriate database configurations.
- Test the setup: Finally, access your Laravel application by entering the public IP or DNS of the EC2 instance in a web browser.
How to create an AWS account?
To create an AWS (Amazon Web Services) account, follow these steps:
- Go to the AWS website at https://aws.amazon.com/.
- Click on the "Create an AWS Account" button.
- On the Create an AWS Account page, enter your email address and choose "I am a new user" option.
- Click on the "Sign in using our secure server" button.
- Fill in your personal information, including your name, address, and phone number.
- Select a unique name for your AWS account. This name will be used to create your AWS account URL.
- Provide your payment information, such as a credit or debit card. Note that AWS offers a Free Tier with limited usage for some services.
- Read the AWS Customer Agreement and click on the checkbox to agree to it.
- Click on the "Create Account and Continue" button.
- You will receive a call on the phone number you provided during the registration process. Follow the instructions provided in the call to verify your identity.
- Once your identity is verified, you can set your account preferences, including language, support plan, and security settings.
- After completing the setup, you will be logged into your new AWS account.
Note that creating an AWS account will require a valid credit or debit card for billing purposes. It's crucial to monitor your AWS usage and understand the costs associated with each service to avoid any unexpected charges.
How to deploy Laravel on AWS Elastic Beanstalk?
To deploy Laravel on AWS Elastic Beanstalk, you can follow the steps below:
- Set up your AWS account by signing up if you haven't already.
- Install the AWS Command Line Interface (CLI) on your local machine.
- Configure the AWS CLI by running the aws configure command and provide your access key ID, secret access key, default region, and output format.
- Create a new Laravel project by running the command laravel new project-name in your terminal.
- Go into your Laravel project directory by running cd project-name.
- Initialize a new Git repository in your project directory by running git init.
- Create an Elastic Beanstalk application environment by running eb init -p PHP and follow the prompts. This will create a new Elastic Beanstalk application and initialize it for PHP.
- Create an environment-specific configuration file by running eb init -e and follow the prompts. This will create an environment-specific .ebextensions directory and configuration file.
- Open the .ebextensions/environment-specific-configuration-file.config file and add the necessary configuration for your Laravel application, such as environment variables, database configuration, and PHP settings. You can refer to the AWS Elastic Beanstalk documentation for more information on how to configure environment-specific settings.
- Commit your changes to Git by running git add . followed by git commit -m "Initial commit".
- Deploy your Laravel application to Elastic Beanstalk by running eb deploy. This will package your application and upload it to Elastic Beanstalk, which will then deploy it to your environment.
- Wait for Elastic Beanstalk to finish deploying your application. You can monitor the deployment progress using the AWS CLI or the AWS Management Console.
- Once the deployment is complete, you can access your Laravel application by opening the environment URL provided by Elastic Beanstalk.
That's it! Your Laravel application is now deployed and running on AWS Elastic Beanstalk.
What is AWS CloudFormation?
AWS CloudFormation is a service offered by Amazon Web Services (AWS) that allows users to create and manage a collection of related AWS resources in an organized and predictable way. It provides a simple and declarative way to create and configure AWS infrastructure as code using templates. These templates, written in JSON or YAML format, define the resources, their configurations, and their relationships within the infrastructure.
With AWS CloudFormation, users can provision and manage a broad range of AWS resources, such as virtual machines, storage volumes, networking components, databases, and more. It enables users to create complex architectures composed of multiple resources and manage their lifecycle, including provisioning, updating, and deletion, in a consistent and automated manner.
CloudFormation templates can be created from scratch or using pre-built templates available in the AWS CloudFormation Registry. Users can also leverage the AWS CloudFormation Designer, a visual tool that allows for the creation and visualization of templates.
By using AWS CloudFormation, users gain benefits such as infrastructure-as-code practices, version control, automated and consistent deployments, resource dependency management, and the ability to scale and replicate infrastructure easily.
What is Laravel?
Laravel is a popular open-source PHP framework used for developing web applications. It follows the Model-View-Controller (MVC) architectural pattern and provides a clean and elegant syntax, making development tasks easier and more efficient.
Laravel offers a multitude of features that contribute to its popularity among developers. Some of these features include an expressive ORM (Object-Relational Mapping) for database management, a powerful routing system, a template engine called Blade for creating dynamic views, built-in authentication and authorization mechanisms, and excellent support for caching, testing, and debugging.
Additionally, Laravel provides a command-line interface called Artisan, which offers various helpful tools for tasks like generating code, performing database migrations, and running unit tests. It also has a vibrant and active community, ensuring frequent updates, documentation, and a wide range of third-party packages.
Overall, Laravel aims to simplify and accelerate the process of web development, allowing developers to focus more on writing clean and maintainable code rather than dealing with repetitive tasks.
